


Less than 5-minutes after reading this tutorial, you will have your own DIY bolster pillow + a DIY bolster pillow cover completed and ready to use in your home. This project is seriously that quick & easy to make!
As the saying goes, a leopard can’t change its spots. Or, perhaps it’s a tiger can’t change his stripes? Whatever the saying is, I’m glad to be neither a tiger nor a leopard.

Although their coats are quite lovely, after a while, I’d crave an outfit change. Leopard print may be very trendy right now, but at some point, it’s going to go the way of all fads.
So if that fad is permanently affixed to my back, I wouldn’t be a cheerful cat. Hah!

I am a girl, after all. And women, on the whole, must admit to being just a touch fickle. And I wholeheartedly embrace that issue quality.
Change, of course, is inevitable.
Times change, tunes change, we have changes of heart, changes of mind, and in my house at least, lots of changes in decor.
Today I want to share with you a very quick, simple and inexpensive DIY. We’re going to make a no-sew, zero commitment, temporary bolster cover. With this project, you can easily swap out your cover to match your seasonal decor.
Oh, and before moving on, if you’re the type who loves decorating your home BIG time, but on a small-time budget? Then you’ll want to grab a free copy of “Builder-Grade To Beautiful: 10 Totally Transformative Home Decorating Solutions, All Under $100!” Click here or on the image below. Your copy will be sent right away!

I love bolster pillows! They are such an easy way (and you know I love easy!) to add some flair to any space. Use bolsters on your bed, on the couch or even on any chair (indoors or outdoors).
But here’s the thing. While bolsters can add a nice pop of color or eye-catching drama to a space, they can also look boring quickly.
I don’t do boring. Nope.
I want fun and eye-catching all the time.
Plus, classic bolster covers can be slightly labor-intensive and require sewing. No more, my friends. It’s time to learn the art of a no-sew bolster pillow cover.
That’s why this DIY bolster pillow cover project is also perfect for when you want to switch things up. When you get a little bored, this is the PERFECT no-sew project to tickle that funny fickle bone 🙂
Anywho here’s what to do…

One-Minute Video Tutorial of DIY bolster pillow and quick change pillow cover
To begin, if you don’t already have a bolster pillow, make one quickly!


Supplies for DIY Bolster Pillows
- Two bath towels OR an old flat-ish standard or king-sized pillow
- Rubber bands

How to Make Your DIY Bolster Pillow
How do you make a no-sew bolster pillow? The simplicity of this technique will blow your mind. Check it out:
Step 1:
Using EITHER a pillow (shown above) OR two stacked bath towels, roll ‘em up the long way.
Just like you’re packing up a sleeping bag after a horrible, uncomfortable night of camping (which you still do even if you don’t like it because I’m sure you’re a rockstar parent) and ready to get the heck out of Dodge.

Step 2:
Secure your rolled-up pillow (or towels) with rubber bands.

Voila! We have a fancy (and free!) towel or pillow-roll bolster insert.
Fast and easy, right? And if you’re like me, you like fast and easy. Because who has enough energy or time in the day for slow and hard?!
Ok, now it’s time to get busy on the super-fast, no-sew DIY bolster pillow cover!
This method is a riff off of ideas from two of my favorite blogs, Miss Mustard Seed & Thistlewood Farms. Miss Mustard Seed’s version in “3-minute, no-sew bolster cover“ is completely removable and no-commitment as well!
Kari Anne, from Thistlewood Farms, created this no-sew variety, which is secured with glue and/or some hand-stitching and made to be permanent. However, it’s the same style as the tutorial I’m going to show you.
Bolster Pillow No-Sew DIY Pillow Cover Supplies
- Bolster pillow insert (or the one you made above)
- Rubber bands
- Safety pins (1-3)
- Fabric remnant, scarf, or other creative material you’d like to use as a cover (I linked some fun options below)

DIY Bolster Pillow Cover Tutorial (No-Sew!)
Step 1:
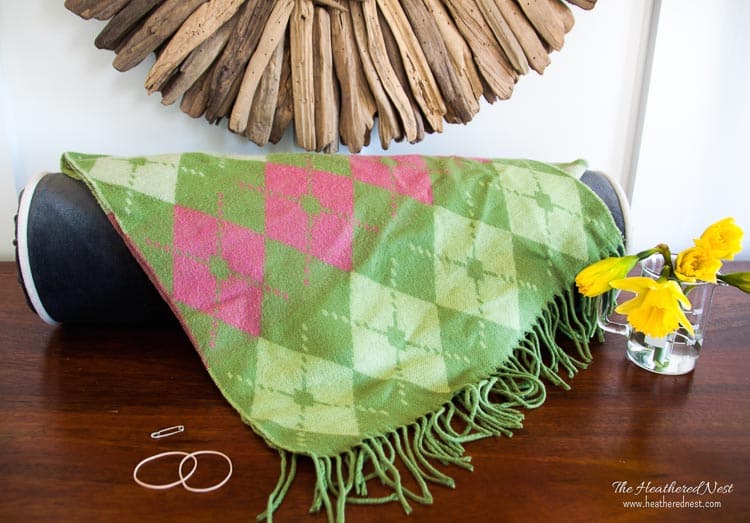
Wrap your fabric/scarf (INSIDE OUT) around your bolster so that it’s completely covered.
Note: My scarf looks the same on both sides, but if your fabric does NOT, the bad side should be facing you at this point.

Step 2:
Grab the excess on one end at a time, and secure it with a rubber band. When you’re done, it’s done.
Your bolster will look like a tootsie roll (like Miss Mustard Seed’s bolster linked above).

Step 3:
Remove the cover, and flip right-side-out. The bunched ends will end up inside the cover and seem to disappear.

Step 4:
Replace your bolster pillow inside the cover, which has now been turned right-side out.
Cover the bolster completely, and smooth out any lumps and bumps from the excess fabric that will now be inside the cover on either end.

Step 5:
Secure the loose edge/seam with a safety pin – or several safety pins. If you prefer not to use safety pins to secure your fabric, you could also use fabric glue or a hot glue gun along the entire seam.
Now your DIY pillow cover is DONE!

Bolster-Making Tips
Making a bolster pillow, if you need one, will likely take you less than a minute. Adding the DIY pillow cover will take another 1-2 minutes, at the most.
I bet that you already have all the supplies you need to make this on hand right now, so no need to go to the store.
I use this technique to switch out bolster pillow covers all year long. Sometimes I don’t even tuck in the ends.
Instead, I’ll tie them with a nice ribbon rustic jute twine, or like above in ourfoyer.
That’s That! Embrace Those fickle feelings and change out your bolster pillow cover as often as you wish!
Go ahead – be a commitment-phobe! With a project that costs nada, and requires almost no time…why not?! Get your crafty fix anytime you want.
Who said a modern-day tigress can’t change her stripes? Silly saying, if you ask me 😉.
Pin this post for later! And if you make one, leave a comment (or better yet, a photo) on the pin! That helps others know whether they want to try this project, too!

Pssst…before you go, I sure would love to hang out with you again really soon! Sign up now and get a no-cost copy of “Builder-Grade To Beautiful: 10 Totally Transformative Home Decorating Solutions, All Under $100!” Click here to enter your email or on the image below. Your copy will be emailed right away!


PGA says
I have material from a bed skirt that I don’t use. How would I wrap the bolster pillow so that there are no frayed ends on each end of the pillow after gathering with a rubber band. I have to cut the material from the bedskirt so there will definitely be frayed ends. Thank you.
Cheryl says
Great idea! I’m certainly going to try this, thanks for sharing… That said, I found the 3 advertisements on a less than 2 minute video to be a bit much ?.
Heather says
I agree Cheryl. Working on it with my ad network. Always a difficult balance. Have the ads, and be able to pay the electric bill, or scrap the ads and have the site look better, but bye bye electricity 😉 Sadly the two are constantly at odds. Thanks for your candor and bringing it to my attention!
Kirsten Stephens says
Wow! Never knew this was so easy to do. Me thinks I am going home to see which scarf I want to turn into a bolster pillow…?
Heather says
YAY! Do it!!!!