


How to create a quick and easy tool organizer…
Yep, a DIY power tool organizer…made with barely any power tools. Ironic? I don’t know. But what I do know is this tool organizer is a quick and easy organizing fix to that clutter that may be stacking up in your workshop, shed, garage, or another little carved-out corner you have at home for tools. It certainly organized ours!
We played with different design ideas, and in the end, we tried to create a tool organizer that was inexpensive, simple to make, and super functional. We’re really happy with how ours turned out, and hope that you’ll be thrilled with yours as well!!

Before we dig into this DIY tutorial, if you have other things to organize around the house, or perhaps things are looking a little cluttered here and there…be sure to grab this! Enter your email and I’ll send you my list of 60 quick decluttering wins! ! 60 ideas for things and places you can declutter around your home in just 5-minutes!

Check out this quick video that will walk you through this tool organizer project…

Video Tutorial: How To Build a DIY Power Tool Organizer


Supplies Needed For Your DIY Tool Organizer
- Saw to cut PVC pipe to length – we used our chop saw (or get your local big box store to cut it for you!)
- Jigsaw
- Screw Gun
- Level
- Stud Finder
- Sanding Block
- 4″ PVC pipe, (we used (5) 12″ long sections, but you might need more or less depending on your tools)
- 3″ PVC pipe, (we used (5) 12″ long sections, but you might need more or less depending on your tools)
- Wire shelf kit– ours is 12″ wide, 6′ long (these kits come in all different lengths and depths)
- 12″ Standards (we needed 3; some kits come with these pieces)
- Brackets (to support the wire shelf; some kits come with these pieces)
- Nylon cable ties (we ❤ these things big time here)>
- 3″ screws>
How to build a DIY power tool organizer
1. Create a plan.
Look at the mess of power tools you own and take stock of the number and sizes. This will help to determine the amount of dedicated space for the tool organizer you need.
We’ve got (4) power screw guns that will fit in a 3″ PVC pipe. We also have two flashlights as part of the Makita’s cordless kit (which we recommend and use constantly) that would fit into 4″ PVC pipe. Our right-angle drill and grinder will also fit into 4″ PVC pipe.
When we began planning this tool organizer, I thought it would only hold our screw guns, but we found out the PVC pipe can hold all kinds of tools.
We ended up with five each of 3″ and 4″ PVC pipes to hold the tools we’ve got as well as extra spots for the new tools we may get down the road (Santa LOVES giving tools, right?).
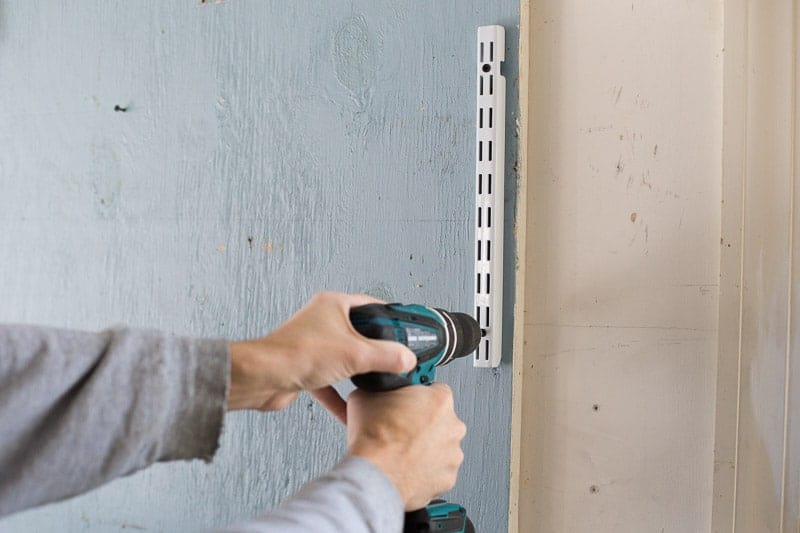
2. Install shelving standards.
I used a 6′ wire shelf. This length left room for additional PVC pipe hangers if needed in the future. Install the vertical shelving standards at a height that will allow you to easily reach the tools and the chargers.
For a 6′ length of shelving, I needed 3 standards. Use a level (I used a 6′ level) to help ensure you are mounting them correctly/level.
A stud finder helps to locate the studs. Pre-drill, then mount the standards to the wall in the location of your studs, 3″ screws.
3. Install Shelving Brackets and Wire Shelf.
Once the standards are installed, hook your shelving brackets into the standards, and place your wire shelf on top. I installed the wire shelf upside down so that the “turned down edge” at the front of the shelf was facing up.
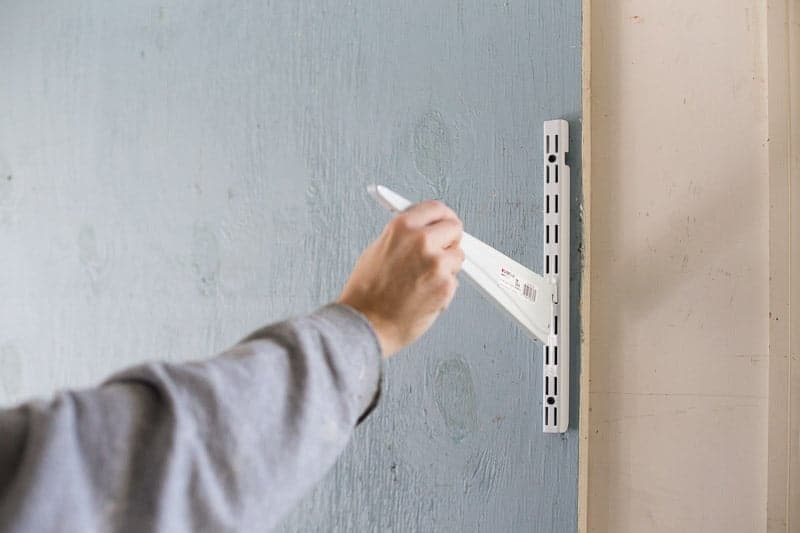
Doing this accomplishes two things: 1. it creates a lip/edge to the shelf so that stuff on the shelf won’t fall off, and 2. the edge won’t interfere with the PVC pipe that will be hanging below.

4. Cut PVC pipe.
Cut the PVC pipe into 12″ lengths. I bought a 10′ long 3″ PVC pipe and a 10′ long 4″ PVC pipe. I bought extra in case I wanted to make additional tool holders.
These are available in 2′ sections at the big box stores, they are just more expensive to buy in the smaller sections. I used my chop saw to cut the sections of 12″ pipe, but the big box stores will cut these sections for you to save you this step.
5. Cut “slots” in PVC, then sand.

In order to hold the screw guns, a slot needs to be cut into the 3″ PVC pipe. This is accomplished using a jigsaw. I made the slot 1-3/4″ wide and 5-1/2″ deep. The jigsaw cuts through the PVC easily, but it does leave a sharp edge.
After you cut out the slot, use the sanding block to knock down the edge and make it nice and smooth.

6. Mount PVC tubes to the wire shelf.
Drill a 1/4″ hole at either end of the PVC pipe. Drill this hole 1/2″ from either end. TIP – when drilling the holes in the 3″ PVC pipe with the slot, make sure these holes are directly opposite the slot cut out, otherwise, your screw guns will not hang straight up and down.
Use the cable ties to attach the PVC pipe to the wire shelf in both the front and back.

Tighten cable tie around wire shelf.

Once taut, snip the end of the tie.

You can hang the PVC pipes in any order and spacing desired. And the great thing is if you want to take them down and reorder them or add more, it’s as easy as snipping the cable ties and rehanging them.

7. Organize and Admire.

Put your chargers and batteries on the shelf right above the tools. Tie up the wires neatly with some more cable ties, then hang those power tools!

An organized garage sure is a beautiful thing, isn’t it?
If you’re looking for other organizing ideas, be sure to check out these posts, too!
Pin this tool organizer project for later:

Ready to get control of the clutter and chaos at home? Here are 60 places you can declutter in just 5-minutes at a time. Grab your free copy now by clicking here or on the picture below:


Leave a Reply