


How to create an inexpensive DIY shoe cubby…
Today, you’ll learn how to create an easy and inexpensive DIY shoe cubby. Why? Do you ever feel that shoes might be the inanimate version of rabbits? It’s like they multiply overnight. SO MANY SHOES!
At our house, most of the shoes live in the garage. Some mornings, I’ll open the garage door and 2 new pairs have arrived.
With three kids + 2 parents (one of whom definitely has some form of diagnosable addiction to shoes, but I won’t name names), that adds up to a whole lotta laces and leather.
So in our quest to somehow have some order and organization in our garage, we created this easy DIY shoe cubby.
If you’re needing some inexpensive shoe storage that you can put together in an hour or two….no wood, glue, paint/stain, nails required….this is the project for you!

Before we jump in…
If you could use some more organizing and less clutter in your life, you’ve come to the right place! Grab a free copy of “60 5-minute decluttering ideas” and get on the road to a calmer, more restful home life in as little as 5-minutes at a time!


Supplies needed for your DIY shoe cubby
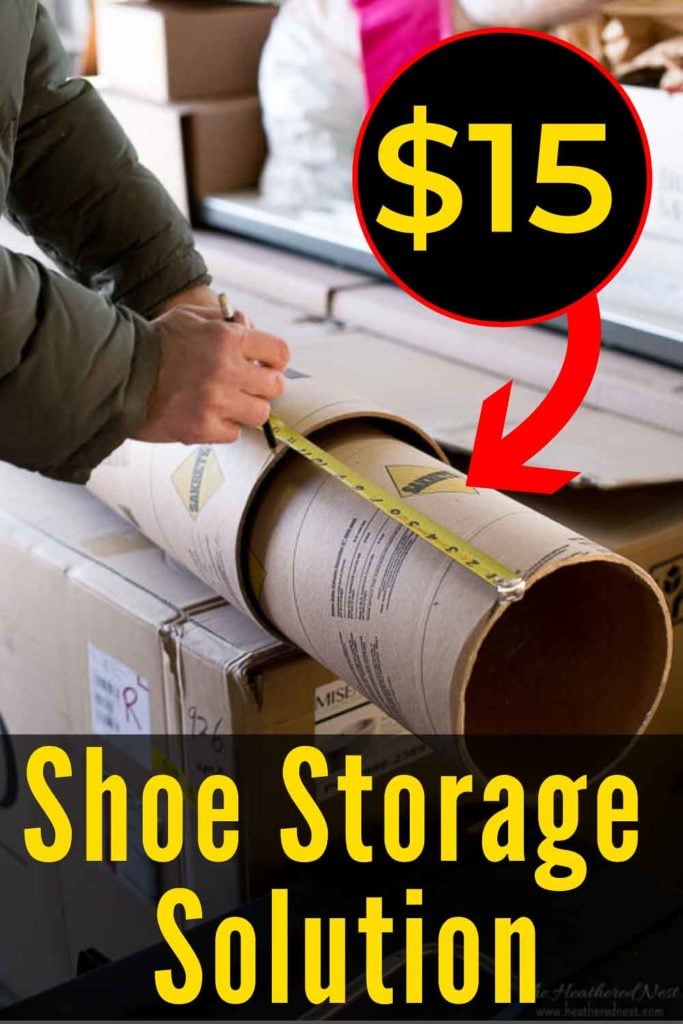
- 8″ concrete form tube(s)
- nylon cable ties
- hacksaw, jigsaw or chop saw
- right angle drill or drill with 1/2″ bit
- scissors or small cutting pliers
- tape measure
- sandpaper or sanding sponge
And here’s a quick video tutorial showing the process of creating this shoe cubby system…

How to build your DIY shoe cubby
1. Determine the configuration of your DIY shoe cubby.
Determine a general plan for your cubby based on the space you have to allocate. We had a 24″ section of wall in our garage right by the door into our house.
Because the concrete form tubes (also called Sonotubes or Sakrete tubes) have an 8″ diameter, we could fit 3 tubes side by side in our layout.
We decided to make (6) vertical rows of the tubes, but that was fairly arbitrary based on the amount of material we purchased.

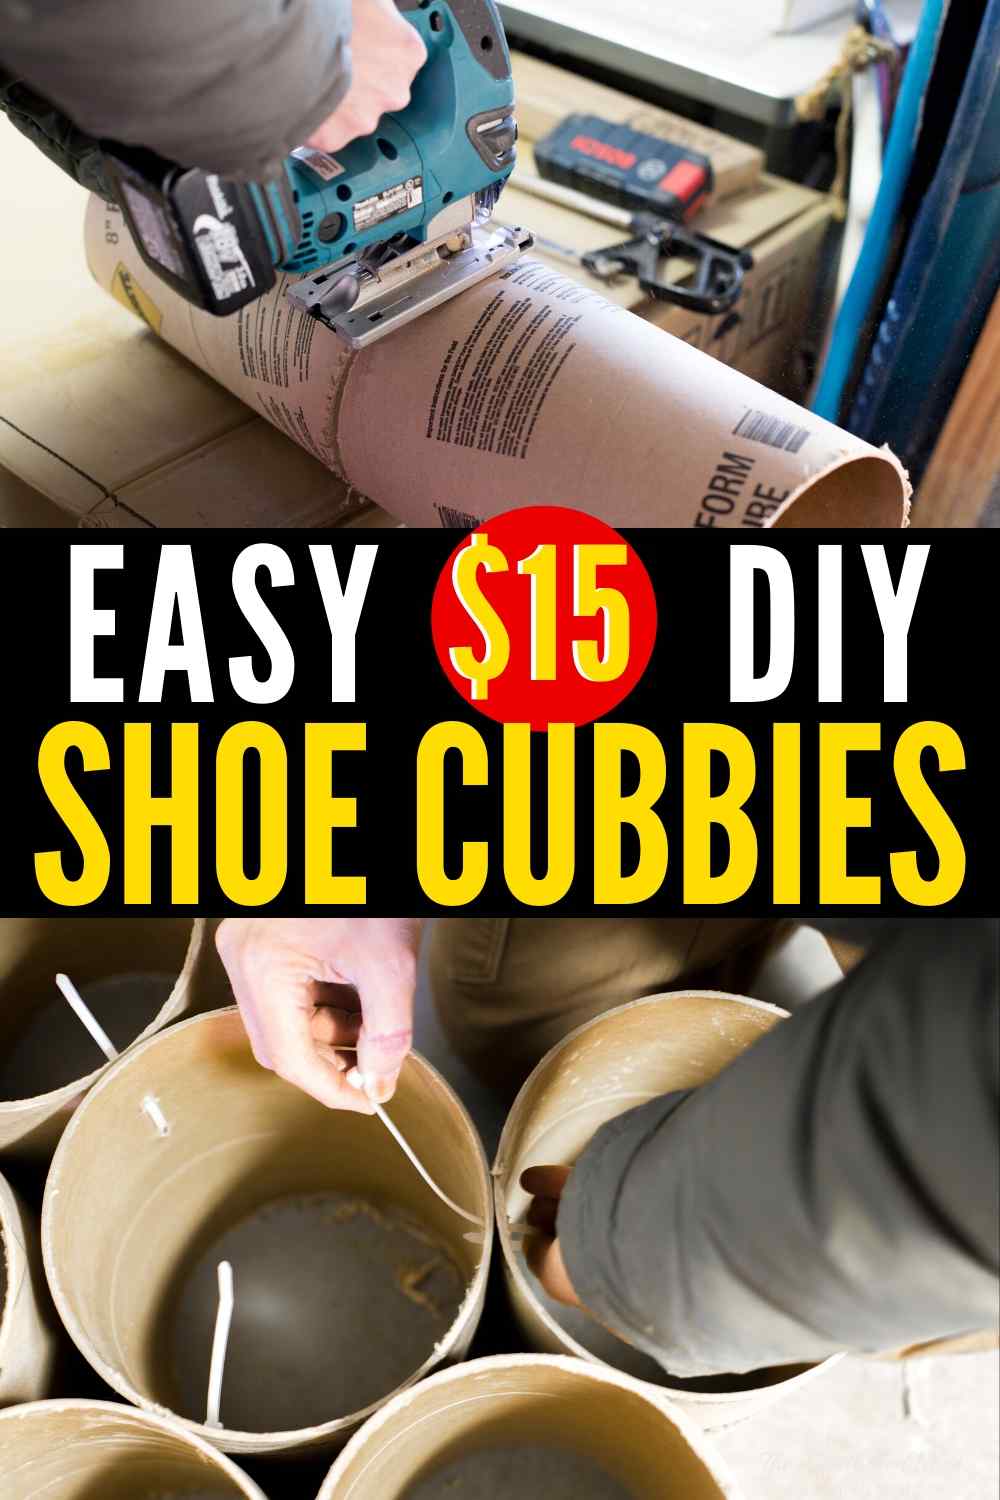
2. Cut concrete tubes to length.
We decided to cut the tubes to 12″ each in length because that dimension would accommodate the longest shoes in our family.
If you’re planning to only store children’s shoes, however, you could likely get away with cutting small lengths.

You can cut these concrete form tubes in all sorts of ways. We tried it with three different saws: a hacksaw, jigsaw, and chop saw.
Use whatever tool you have on hand/feel safest using (to us, the chop saw and jigsaw performed the best, but don’t use either if you’re not comfortable/confident using those tools).

3. Sand any rough edges.
After cutting your concrete form tubes to length, the ends may be a bit ragged looking. Quickly running a sanding sponge around the ends will help remove the frayed edges.
I prefer the sanding sponge to a sanding block for this step because the sponge is flexible and can easily conform to the shape of the tube.

4. Layout shoe cubby configuration on the floor.
We will be using the floor as a flat surface on which to assemble our shoe cubby. The side of the concrete form tubes sitting on the ground will be the front of the cubbies.
Layout the configuration of your shoe cubby as desired, making sure all the sections seem to fit together well. We found that the Sakrete tube was not uniform in diameter.
Because of the size variation, we moved sections around to make sure that everything seemed to fit together nicely before proceeding.

5. Drill (2) holes for a nylon cable tie through two adjacent tubes.
We used a right-angle drill in order to drill through two pieces of the Sonotube at once from the interior.
If you don’t have a right angle drill, you can do the same with a regular drill, but you’ll have to move adjacent sections of tube out of the way while you drill from the outside to the inside of the concrete form tubes.
You’ll need to drill two holes per tube in which to weave a nylon cable tie through.

6. Connect two tubes with a nylon cable tie.
With the holes drilled in two adjacent tubes, all that’s left to do is to connect the concrete form tube sections with nylon cable ties.

Place the cable tie through the holes in the adjacent tubes and cinch it closed, as tightly as possible. You may need the help of some pliers.

7. Continue drilling holes and connecting concrete tube forms with cable ties.
As you move through this process, you’ll want to not only connect the tubes that sit side by side but also connect one vertical row to another intermittently. This will ensure that the unit will stay connected as a whole.
8. Snip off excess nylon.
Once all the cable ties have been cinched closed, you can snip the extra length with scissors or snips.
9. Anchor the unit to a wall.
Since the unit is made of cardboard, it can use a little help to stay upright.
We anchored ours to the wall with a simple hook in the wall (made sure to hit a stud…if a stud isn’t available, you’ll want to use a drywall anchor) and a zip tie.

We drilled a hole in the top of the center tube on the upper row and placed a zip tie through it, closed it in a loop, and hooked it onto the wall hook.

That’s it! I hope that this easy DIY shoe cubby brings a little calm to the shoe clutter at your house, too! Let us know how it works out for you.
If you’re looking for more storage and organizing ideas for your home, be sure to check these out, too:
Pin this DIY shoe cubby post for later:

Ready to get control of the clutter and chaos at home? Here are 60 places you can declutter in just 5-minutes at a time. Grab your free copy now by clicking here or on the picture below:


Cynn says
Love this idea, I’m just wondering how well it holds up when shoes are soiled or wet?
Heather says
Hi Cynn, We’ve used it for years without any issue…that said, I don’t let my kids put sopping wet, snowy or muddy shoes straight into the cubbies. I’ll tell them to leave them sitting in the garage to dry out first…and if something is caked with mud, then I’d be cleaning them first no matter what system I had in place 😉
Joven says
Definitely will be making this brilliant idea this month. I badly need a vertical shoe storage due to limited space of my room.
Heather says
Great! Let us know how you like it!
Sue says
This is a fabulous idea that anyone diy.
Heather says
I’m so glad you like it!!