A balloon piñata is typically made with paper mache. THIS method is MUCH faster and easier!
Want to know how to make a piñata with a balloon for your next party, holiday, or other special occasion? A balloon piñata is a fun and simple craft that your party guests are sure to love!
Typically, this craft is made using strips of newspaper, and messy paper mache paste made from either a mixture part flour, part water OR alternatively mod podge or white glue + water.
But not THIS version! Today, I’ll show the simple steps to make a quick, easy 10-minute homemade pinata using a balloon and packing tape…NO messy layers of paper mache, or extended drying time required!

We all know, kids ❤️ piñatas.
And really, what’s not to love? You get to whack all your parental frustrations away with the swing of a stick and a thunk on something that won’t say “ouch” or go tattle to mom when you hit it.
You even get rewarded for giving the thing a good beating. SUGAR! I mean, this is the stuff of kid-heaven.

There are lots of DIY piñatas out there, but when I saw this one on YouTube, I really, really liked the idea…because it was waaaaayyyy quicker and easier than the other methods I’ve seen.
In order to help you create your own pinata, first let’s talk supplies! You only need simple materials for this project, nothing fancy…but definitely don’t forget the candy!!

DIY Piñata Supply List
- Inflated balloon of choice (we used a heart-shaped balloon)
- Packing tape (several rolls) – I used clear, but any color would be adorable, too!
- STRONG string
- Scissors
- Xacto blade/retractable box cutter
- Candy of choice (lots of it!) – although small toys or other little party favors would work as well
- Tissue paper fringe: something like this (optional)
- hot glue/hot glue gun (optional for attaching fringe on outside of pinata)
- Kids who like sugar and hitting things
Here’s a short and simple video overview to show you how to make your own piñata (the easy way ;)…

How To Make a Piñata With a Balloon Video Tutorial
Step by Step Instructions: How To Make A Piñata With A Balloon
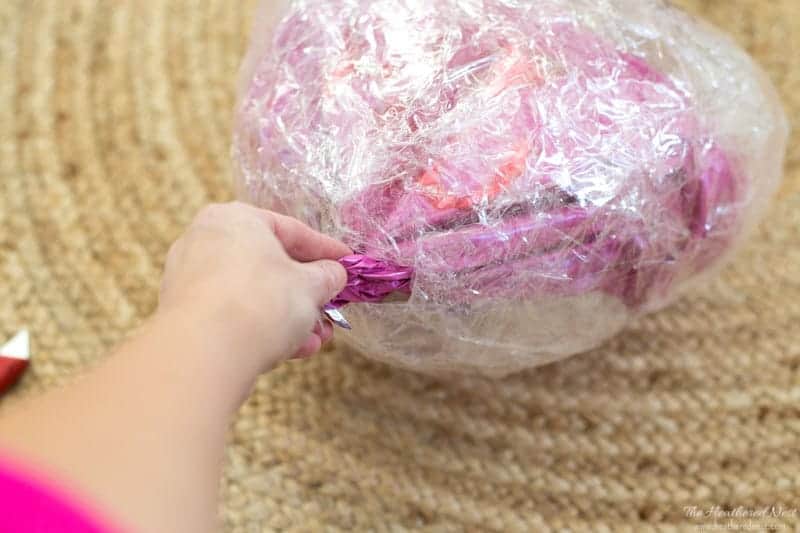
1. Wrap inflated balloon in tape, sticky side facing OUT.
Wrapping the first layer of tape around the balloon is the hardest part of this craft. It’s just kind of awkward and, well, sticky.
It will be easiest to accomplish with two people. One person to hold and maneuver the balloon, the other to wrap the tape.
Again, the STICKY SIDE should be facing you, NOT sticking to the balloon.
Continue wrapping the tape around the balloon until the entire balloon is covered in a layer of tape.
Don’t go overboard though. The more tape you use, the harder it will be to actually break the piñata.

2. Wrap balloon in tape, sticky side facing IN.
The next step is to repeat the wrapping process with a second layer, this time with the sticky side facing IN toward the balloon. Continue wrapping the tape around the balloon until it doesn’t feel sticky anywhere.
Again, don’t overdo it with the tape, otherwise, your piñata busting activity may run very, very long.

3. Cut a small opening in the bottom of the wrapped balloon; remove the balloon.
Use box cutters to cut a three-sided flap in the bottom of the balloon.
The box cutters will puncture the balloon, and once punctured, reach through the hole and pull the balloon out.
Alternatively, you could leave the balloon in place! That way you’d have more of a colorful piñata rather than a clear one.

4. Cut slits in the top of the piñata; insert strong twine or nylon rope.
Using the box cutter, cut several slits in the top of the piñata, and weave your twine, string or rope through.
We tried this several ways and found it works best to cut the slits far apart from each other. If they are cut too close to one another, the piñata more easily breaks at this point.
5. To make the piñata easier to break…
If you are doing this with small children, this piñata may be too difficult for them to break without a little alteration. The packing tape is pretty strong!
To make it easier, cut some small holes all around the piñata to create some “easy” exit points, then just lightly cover with a piece of tape.
If you’re using this for bigger kids or adults, then there may be no need to alter the piñata like this prior to playing.
6. Stuff piñata with candy (or other fun surprises); cover hole in the bottom with tape.
Stuff the piñata with candy! Then simply cover the hole back up with tape. Your piñata is ready to hang.

7. (Optional) Decorate Outside of Balloon Pinata.
You can now cover the outside of your piñata with fringe garlands and/or crepe paper streamers (use a hot glue gun to attach) to make it look more traditional.
Of course the easiest thing is to do nothing, and just roll with the tape version.
8. Hang your piñata.
Find a convenient location to hang your piñata, and tie it up.
8. Gather some kids who like sugar and hitting things.
Time to play! Batter up!

Helpful Tips and FAQ’s
Any type of balloon can work! Mylar, latex, even a large punching balloon/punch ball could work using this method. Just pick something you like that works well with the theme of the party.
Yes! You can use balloons of various shapes, but a very intricate or detailed shape…like an animal…may not turn out great as it would be really hard to get the tape to cling perfectly to all the curves and corners.
We used this technique with a heart-shaped balloon, and it turned out great!
This is a great way to make a small piñata, or a large piñata – you just need to pick out a balloon tha matches the size of the piñata you’d like to create.
Clear packing tape works well. Something stronger like duct tape would be VERY hard to break, and may end up being not so much fun more frustration.
On the flip side, masking tape would also not work well. Although it’s not as strong as duct tape, it’s thinner, so it would take a lot longer to wrap your balloon with.
The balloon can be filled with helium OR air. It doesn’t matter at all since you’ll be popping the balloon before the end of the project.


Have a blast with this simple, quick, and inexpensive DIY piñata at your birthday party, a Valentines Day party (like we made ours for), or any other special occasion this year! The whole thing should take you about 10 minutes once you’ve gathered your supplies!
And no having to clean up all the strips of paper, excess paste, mod podge or flour/water goo like you’d have to with a paper mache piñata! I’d call that a win!
We hope you ❤️ making your own beautiful DIY pinata as much as we did making our own!
Looking for more fun craft ideas? We’ve got you covered! Check these articles out, too!
- Valentines Day Card Ideas for Kids (Without Candy)
- 55+ BEST Cute & Creative Valentine Box Ideas For Kids
- 33 Amazing DIY Duct Tape Crafts That Are A Must See!
- How To Make Pom Poms (The BEST Way) – A Review of 4 Methods
- 45 Perfectly Puffy Pom Pom Crafts
- 25 Delightful Dr. Seuss Crafts & Activities for Kids
- 31 Easy, Fun Dinosaur Crafts & Activities For Kids
- 29 Best Christmas Handprint Crafts: Easy, Cute & Fun!
- 30 Easy Popsicle Stick Christmas Crafts For Kids
Pin this post for later! And if you make one, leave a comment (or better yet, a photo) on the pin! That helps others know whether they want to try this project, too!


Leave a Reply