
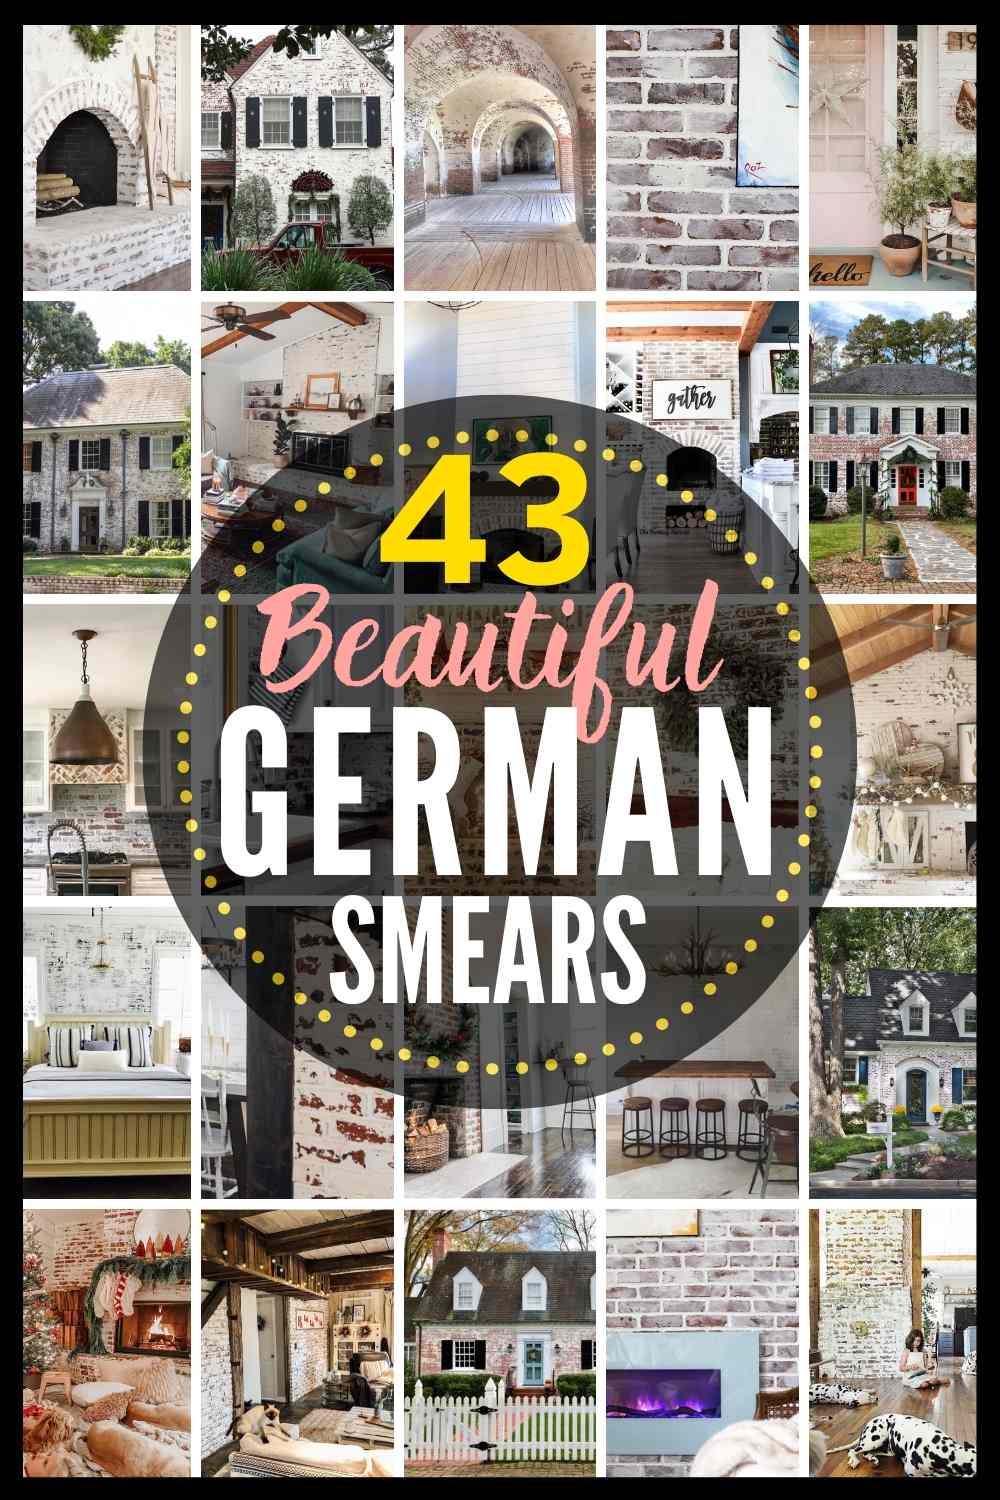
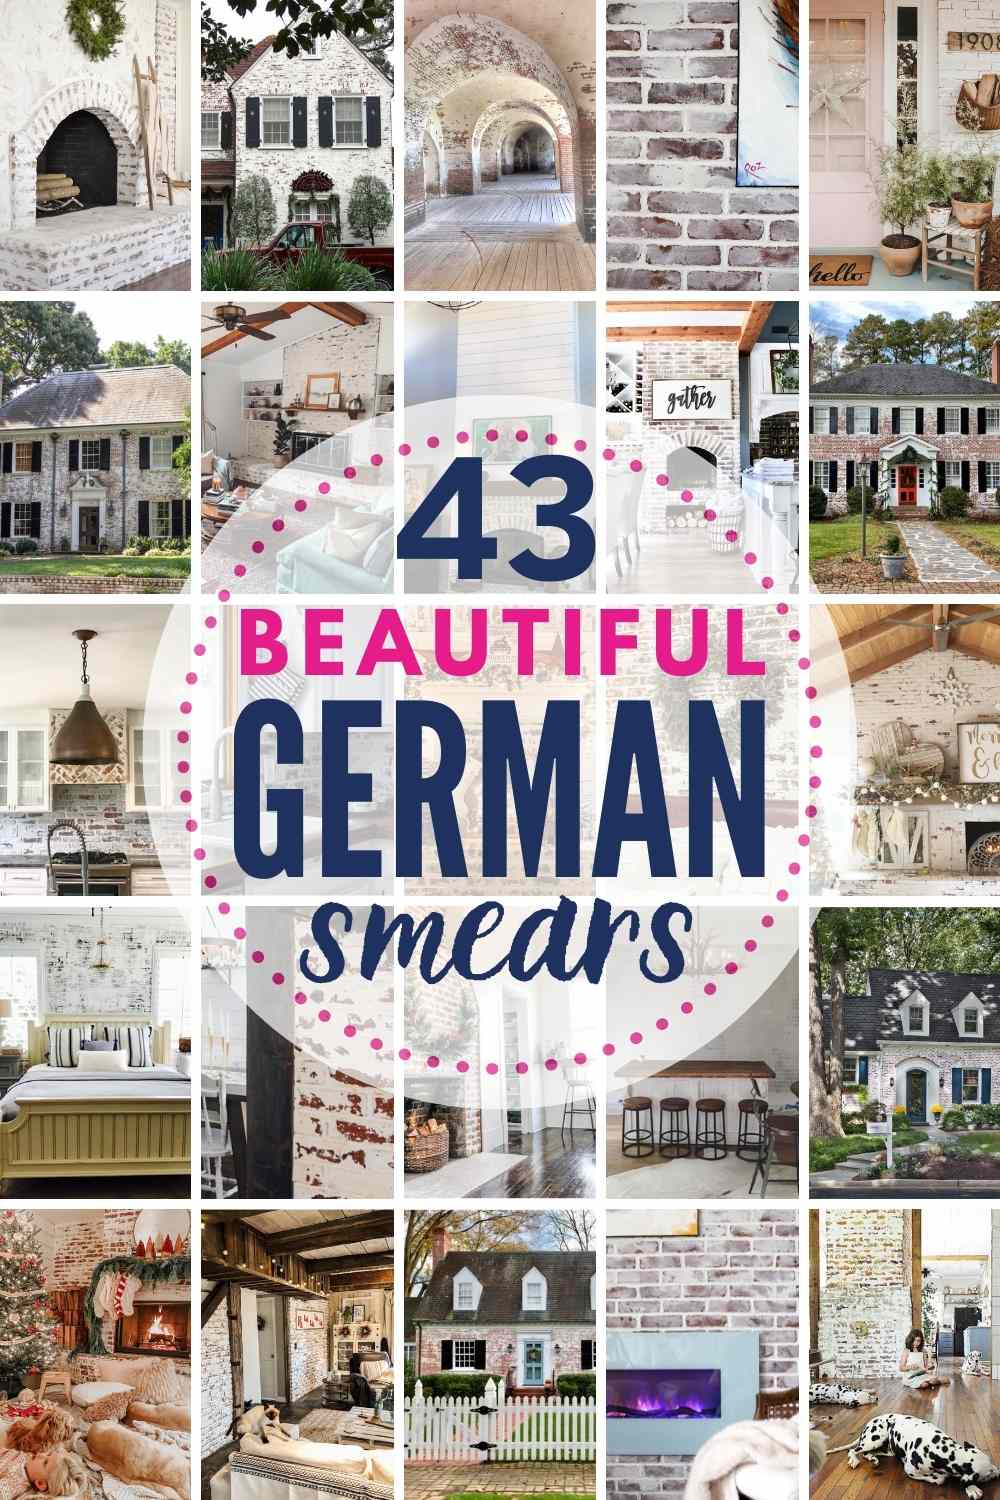
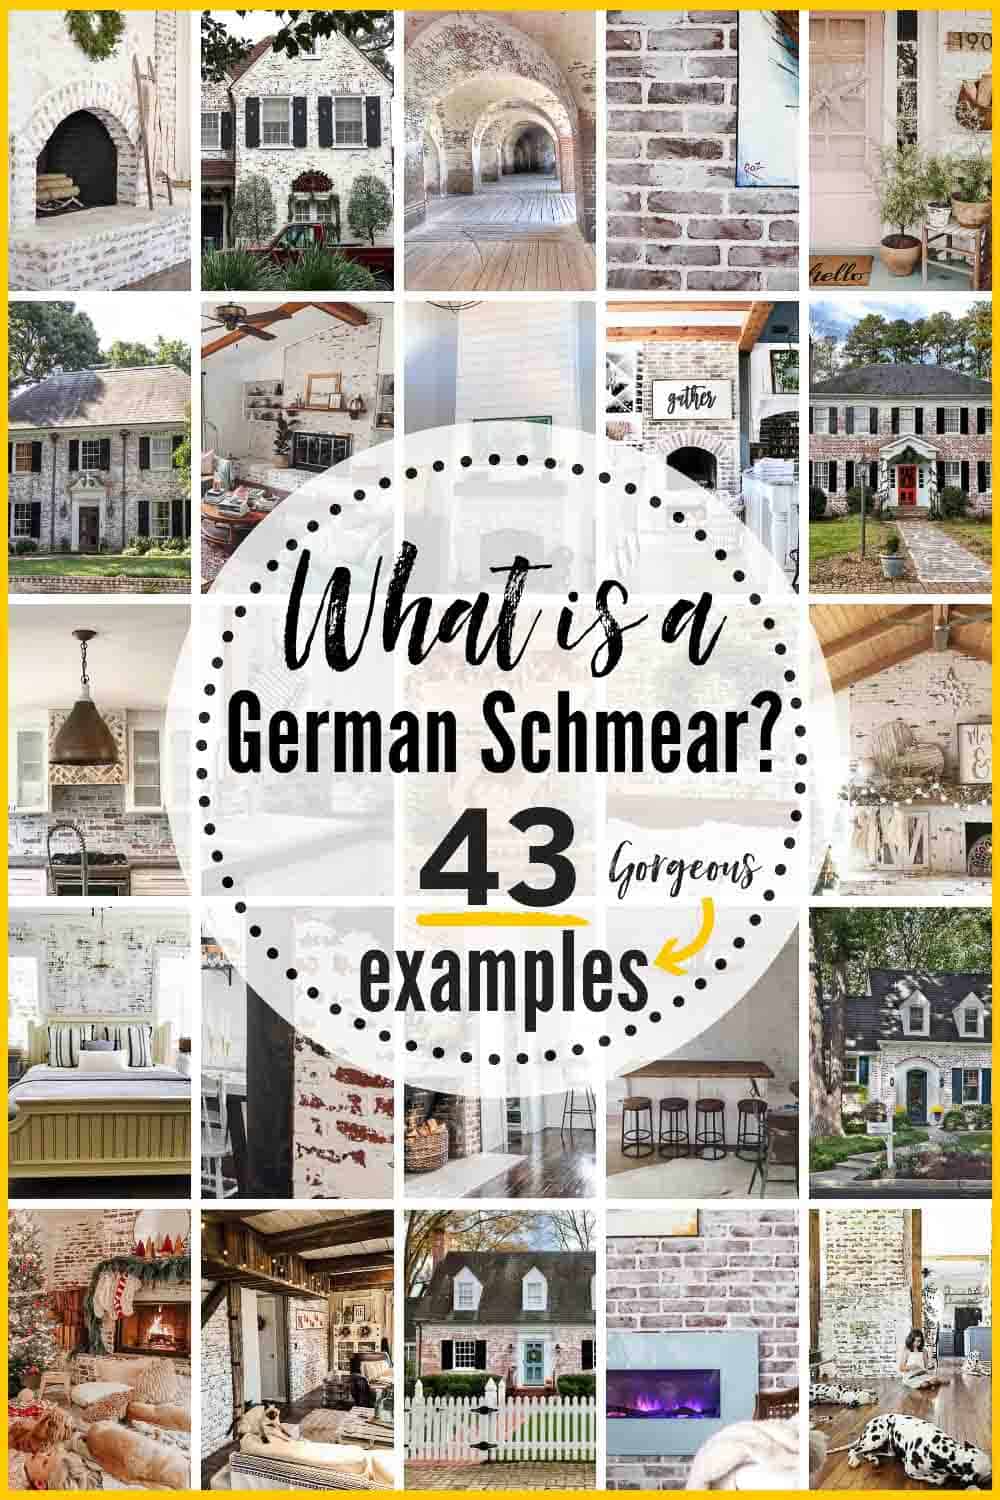
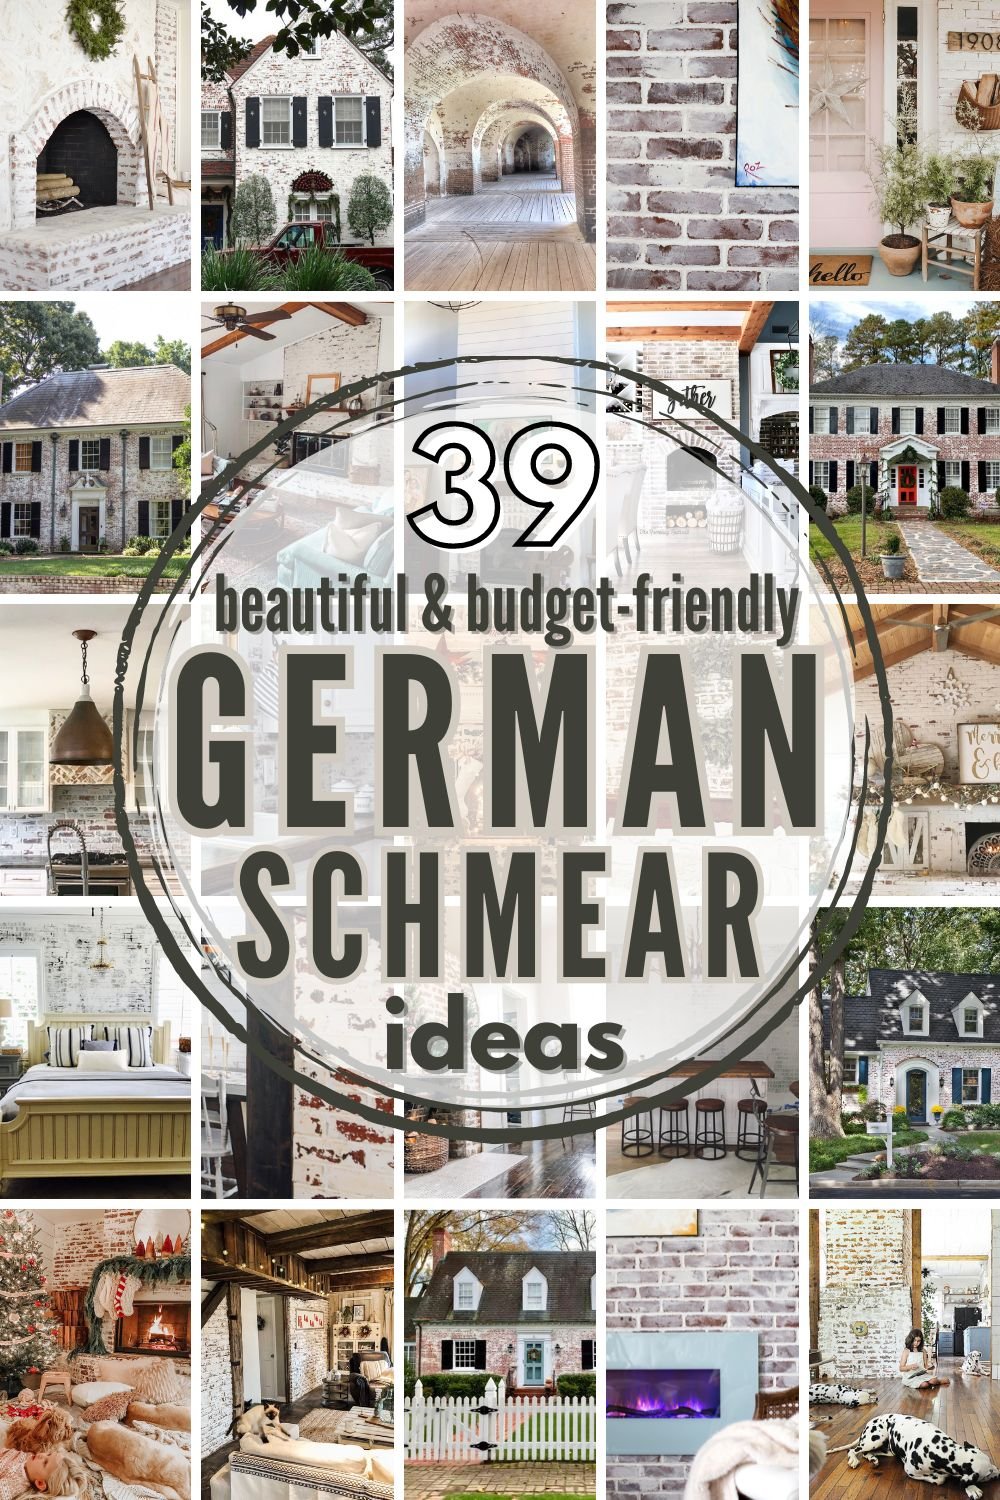

Read all about German Schmear (AKA German Smear) and see Jaw-Dropping Brick Examples!
German schmear. Or German smear. Perhaps it’s a term you’ve never heard. But I’m betting it’s a look you’ve seen. And if you made it here, I’m guessing it’s a look that you and I both like. A lot.
Many of us have brick somewhere in our homes, be it outside or inside. And unfortunately, that brick may not be pretty. In fact, it may be rather outdated at best – and ugly at worst. Figuring out what to do with it can be a challenge because it’s an expensive (and often extensively used) building material.
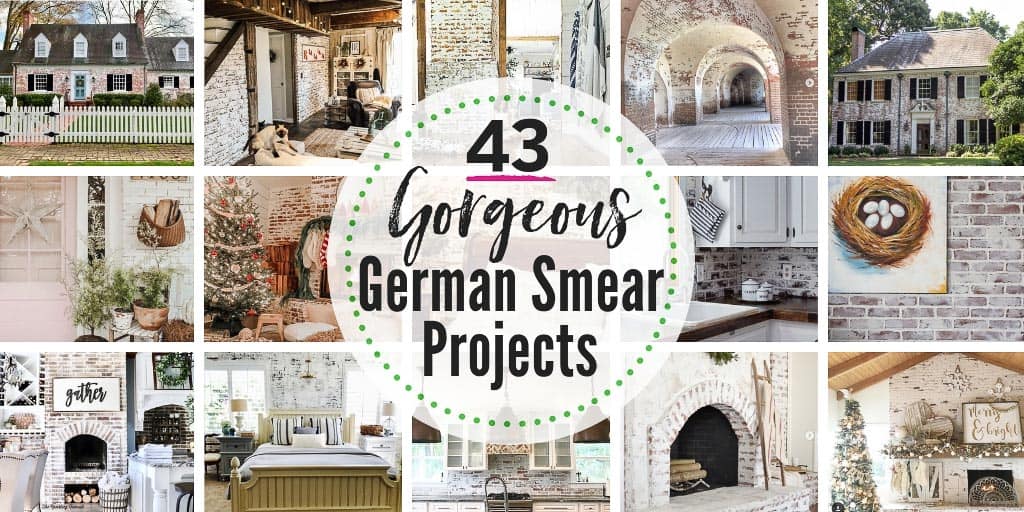
Before we dig into this beautiful, budget-friendly brick makeover technique, aka a “German schmear,” here’s a highlight reel of some brick eye candy for you!

Here’s what you’ll find in this article today:

Back to the brick…
If you tear all the brick out and replace it, even for a small area like a fireplace surround, you’re potentially looking at thousands of dollars spent. Especially in today’s market.
And if you’re a DIY’er, that price tag also comes with a hefty side of manual labor ripping down Humpty and putting him back together again.
But if you’re a bit more on the thrifty side (and perhaps a tad brave!), then there are some GREAT alternatives to update outdated brick. Namely:
Ways to update outdated/ugly brick
- german smear (AKA “mortar wash”
- whitewashing
- limewashing
- painting
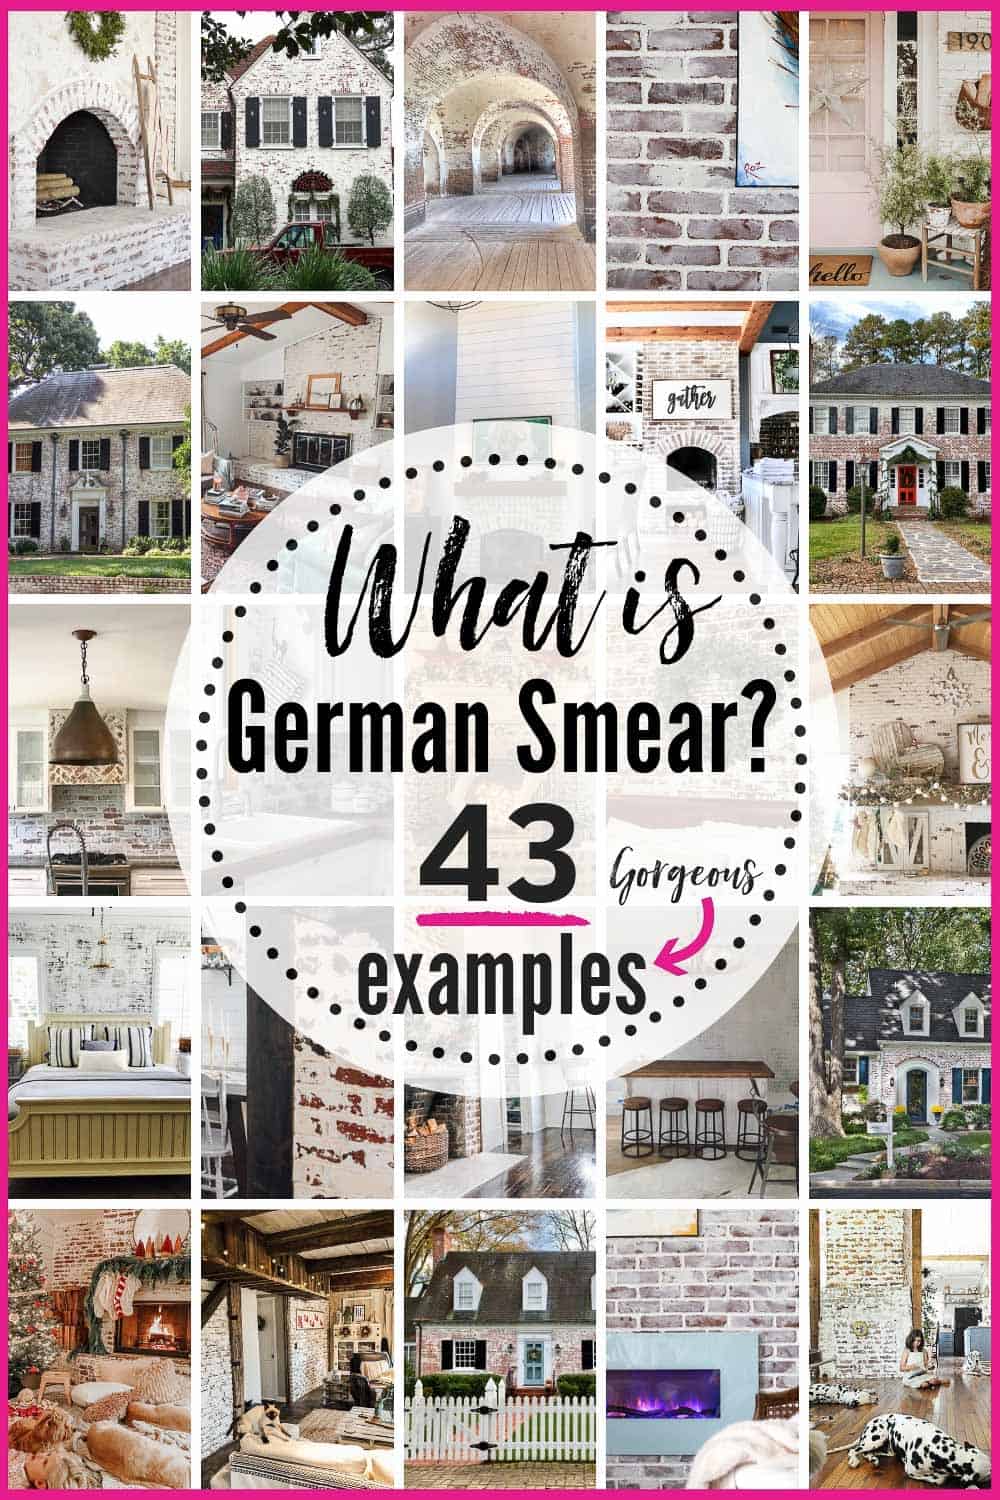
FAQs about German Smear
The German schmear (in English known as the u0022German smearu0022) is a technique used to finish or update brick by smearing (hence the name) mortar over the surface.
What’s the difference between German Schmear and whitewash?
A German schmear is a mortar coating applied to brick in patches to create a rustic or antique appearance. By contrast, a whitewash is a thin layer applied evenly over the entire brick surface.
How long does German Smear last?
The process produces a permanent result that doesn’t fade, so you don’t need to worry about maintaining it, as you do with whitewash or limewash techniques.
Can you German schmear faux brick?
Yes! You can do the same process over faux brick, giving it an (almost) instant upgrade and the appearance of being more expensive than it is.
A Quick Review of Brick Updating Techniques
Because there’s a lot of confusion on the web about these techniques and the differences between them, let’s do a quick review before we delve into all the beautiful German schmear pics you’ll drool over.
1. Painting brick
Painting is exactly what it sounds like. It involves taking some paint, a brush (or roller), and slapping the paint on your brick. Didn’t know you could do that? Well, you can.
The caveat is that you need to make sure you use the RIGHT type of paint for your specific application. If you’re painting exterior brick, use exterior paint. And vice versa for an interior job. YES, you can use regular latex paint.
For best results, consult with the folks at your local paint counter. They’ll help steer you in the right direction of the best product for your job.
Painting your brick will give you a very uniform look once complete. You will still see the texture of the brick, but variations in the shading and color of the brick will be completely covered.
Before we go further…

2. Whitewashing
Whitewashing is a simple modification to regular, old painting. Instead of slapping paint directly onto your brick, you’ll water it down first. How much you water it down depends on the look you are wanting to achieve.
More watery = a more transparent finish (more brick will show through).
Conversely, less water = a more opaque finish (less brick will show through).
Whitewashing will not give you a perfectly uniform finish in the same way that paint will. We whitewashed our family room fireplace and wrote a whitewashing tutorial if you’d like to learn more.

3. Limewashing
Lime washing uses a special type of paint called “slaked lime paint” to create a finish that’s quite similar to a whitewashed look, but this process gives you a bit more control over how the final product looks.
While whitewashing is really only one step (applying the whitewash), limewashing is a two-step process.
My friend Lauren at Bless’er House has a great, step-by-step tutorial on the limewash technique if you decide to go this route! First, apply the limewash and wait till it’s almost dry. Next, spritz sections with water and remove the product here and there to create a more mottled, vintage look, with brick showing through more in some spots and less in others.
The product I’ve seen discussed and used most for this technique is this one.
4. German smear (or mortar washing)
Last but not least, the German schmear (AKA German smear and also mortar wash) is another great way to update your outdated, ugly brick.
It happens to be my absolute FAVORITE look, and what’s so great is that it is likely the most budget-friendly option on this list (unless we’re talking about a whole house, in which case, the whitewashing technique may come out on top).
The other three techniques are all rather similar in that you’re applying a paint/paint-type product to the brick. The German smear kind of stands on its own in that regard. For this technique, we’re using mortar (I recommend this brand OR this one) to apply to the brick.
If you want step-by-step directions for the process, check out my step-by-step instructions for the German smear!

What Sets the German Smear Apart from the Crowd
The thing (to me) that makes this technique stand out from the pack is that it allows you to be more selective about covering your brick. For example, if you want some of the native brick to show through, then this is probably the best technique for you to try.
In the other types of brick updates, you cover everything, then go back and take some of the finish off.
But in the German smear, you don’t have to cover everything. You can easily leave patches of brick completely alone so that the original brick will show through perfectly.

Isn’t it gorgeous?
The other major difference between this technique and the rest is a matter of TEXTURE. Since the other techniques all employ a paint product, they don’t change the texture of the brick.
A German smear will allow you to make the brick much more textured…only if you want to. I’ve tried to include some examples below of variations in the textures that people have achieved with their mortar washes.
To create a more textured look, you will simply apply MORE mortar and leave the bulk of it in place. If you decide you want a smoother finish, then you’ll simply wipe more of the mortar off. It’s as easy as that.
The Hardest Part of Updating Your Brick
There is one thing I will PROMISE you about all of the techniques detailed above…
The absolute hardest part of ANY of these brick updates is deciding to actually do it.
It’s true!! I know because I’ve been there several times! It is completely nerve-wracking deciding to take a paintbrush or a putty knife to your brick. It feels very daunting and permanent. And it IS. That’s what’s so scary. Once you start, there truly is no going back.
But here’s the thing (ready for some tough love?).
If you hate how your brick looks now and find yourself pinning over whitewashed or German-smeared brick all the time, then you just need to go ahead and slap on that paint or mortar, friend!
I PROMISE it is not hard to do. And there’s no real right or wrong way to achieve this look. Translation: your finished product won’t look wrong, and if you hate it already, it can’t look worse than it already does!
Check out the tutorial, then go for it. Trust me.
Worst case scenario? You do a little section and hate it. Then, you can either quickly scrub it off with lots of water before it dries, OR, go the paint route and end up with a nice, smooth coat of fresh paint over that 80’s ugly brick. It won’t cost you much money or time, and I’m guessing you’ll be very happy you did it.
If NONE of these options seems totally up your alley, then check out this post about DIY brick updates. You may find your winner there!
Gorgeous German Schmear Examples
Ok, now that you know the difference between the various techniques for updating bricks, it’s time to take a deeper dive into the German smear technique by checking out real homes that use it!
1. Home Sweet Home
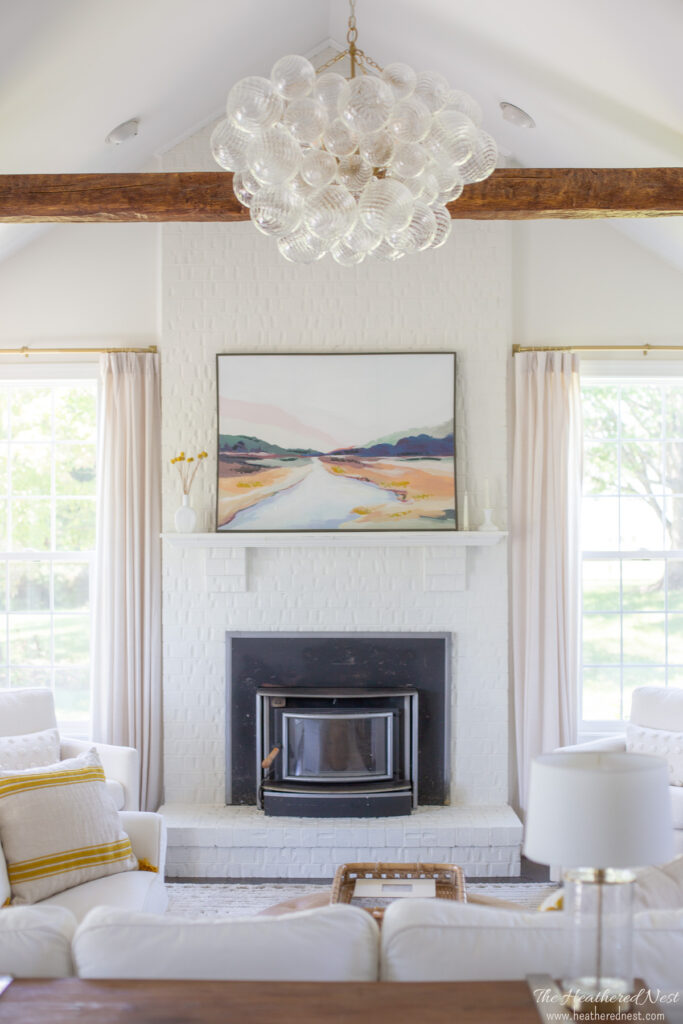
First up: us! Here’s our first foray into the realm of German smear. We constructed this faux brick wall with a built-in electric fireplace (yes, that’s a real thing) as part of our master bedroom renovation project.
Check out the full German smear tutorial to learn how we did it.
I said it before, and I’ll say it again: In my honest opinion, the ONLY hard thing about this mortar wash technique is working up the guts to smear the first swipe of mortar on the brick (or faux brick). Once you’ve done that, the rest is really quite simple!

Before I move on to the rest of these gorgeous examples of German smear, let me just mention that if you prefer more of a uniform look, then perhaps a better choice for you is a brick whitewash. We tackled a fireplace whitewash in our home as well! Check out our brick whitewash tutorial here.
2. Rustic Front Porch Beauty
Can’t you just envision this technique on every modern farmhouse-style home? We Lived Happily Ever After added style and a little antique quality to this gorgeous covered porch by using German schmear on the brick steps and foundation.

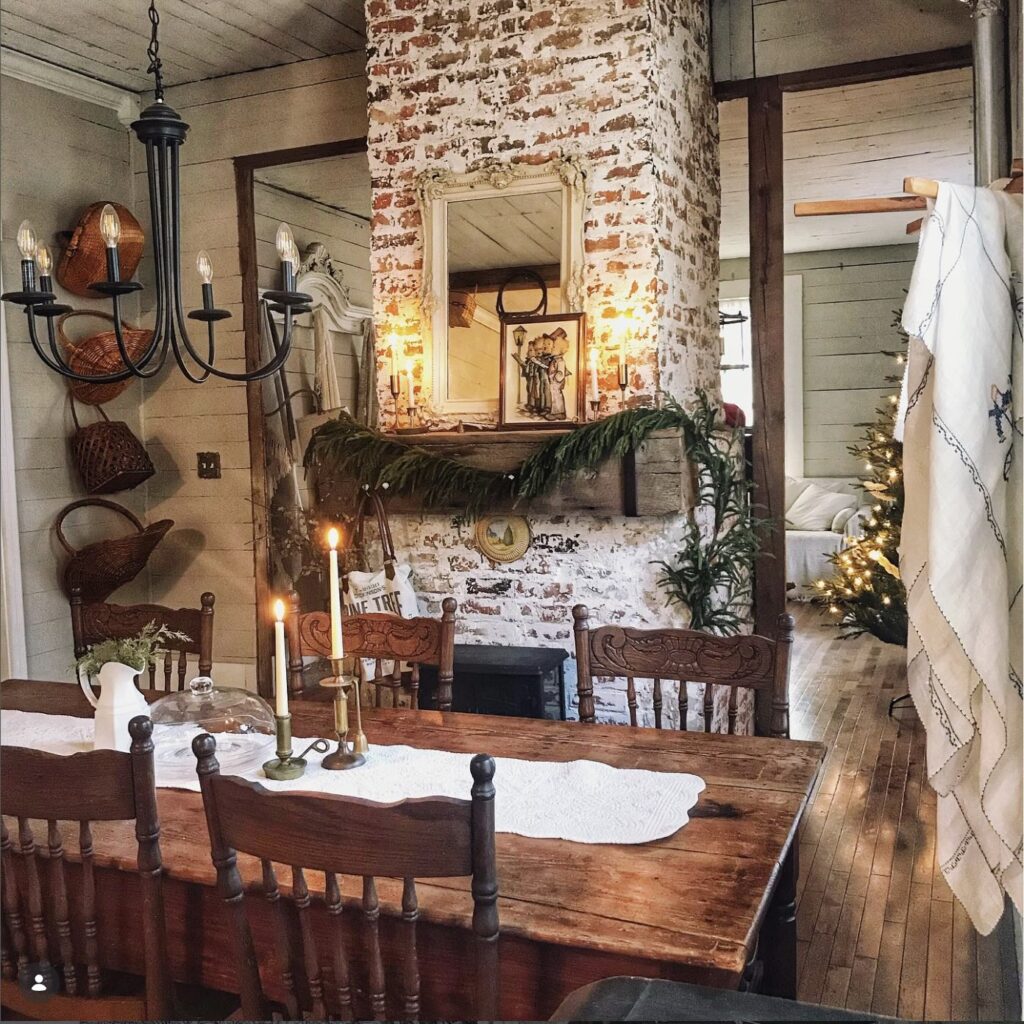
3. Rustic Victorian Beauty
Stunning! This Victorian home renovation project from @design_build_project in South Carolina includes a drool-worthy fireplace German smear.
4. Not Limited to Fireplaces
The German schmear technique isn’t just ideal for fireplaces or home exteriors! Oulavix demonstrates how amazing (and varied) this look can be on an interior brick wall.

5. Updated and Chic with German Smear
Do you see how there are sections of the bricks on this lovely fireplace from @foundandreloved that are completely untouched by the mortar? This is a hallmark of the mortar wash technique and the quality that sets it apart from other techniques.
6. Affordable Large-Scale Update Option
This stunning house from @glimpsesofthesouth in Marietta, GA, shows what this technique can look like on a large-scale project. If you’re trying to refinish brick without taking out a second mortgage, German schmear is the most affordable option.
7. Minimalist Approach
The German smear method has a huge range of possibilities, as you can see on this interior brick wall from Remington Avenue.
Instead of covering large portions of the bricks here, the mortar is mainly in those spaces where the bricks join together. It’s a different look but very clean and chic.

8. Perfect for Bedrooms
Here is a lovely German schmear project found in a bedroom from @kingstonvignettes. People have used this technique successfully on everything from real brick to thin brick veneers to brick paneling, and it looks lovely every time (and in every place)!
9. Change the Look with a Heavy Application
Did you know that this fireplace from Taryn Whiteaker uses the German smear method too? Here the mortar was applied in a very thick coating to completely cover the brick and give it a new texture. Wow!

10. Maintenance-Free Sophistication
Here’s an example of a beautiful German schmear backsplash in a kitchen from @onepartrustic. Love! Plus, since this technique is permanent, you don’t need to worry about the cost and time of doing maintenance.
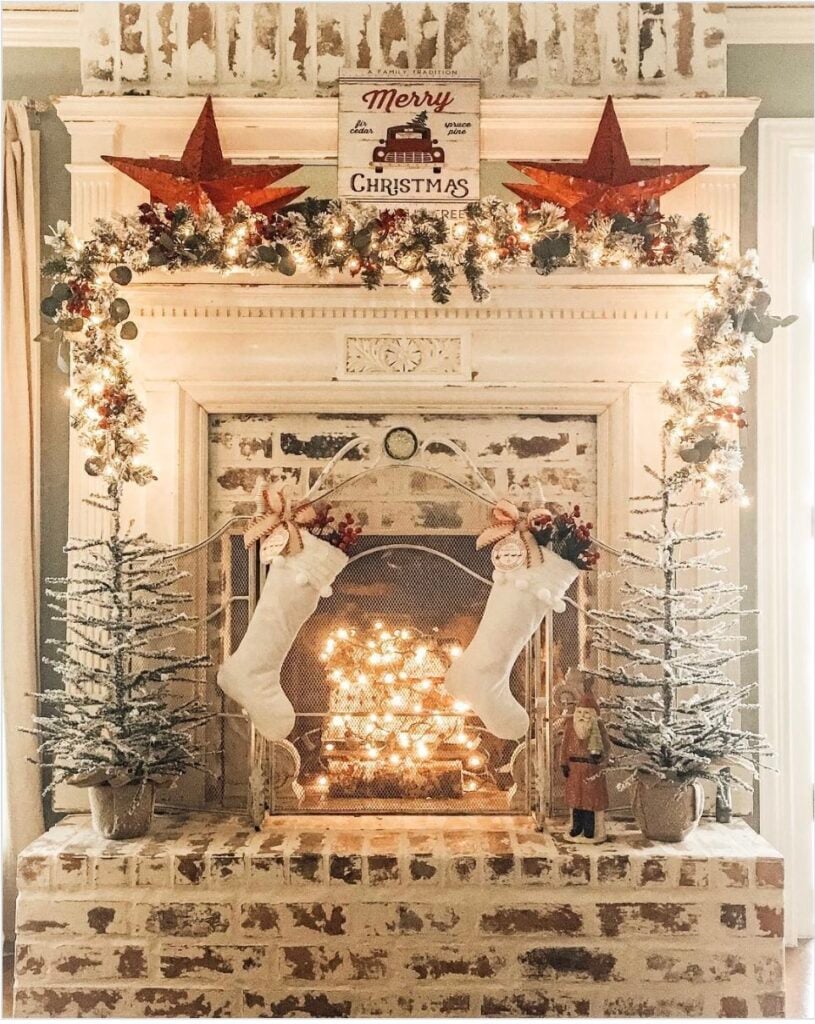
11. Rustic Stunner
Choose to cover as much or as little of the brick as you decide you like. In this example from @dollarhideranch, the brick is mostly covered…only little tiny areas of the original red are showing through. I can’t take my eyes off this image!
Grab your free printable instructions and supply list now.
12. The Messy Middle
Here is an in-process shot of a mortar wash from @jessicaleighart.co. No tape measure, no power tools…just “hmmm, this looks good here” and “maybe I need some more over there”. It’s an “artsy” process that requires you to kind of go with your gut.
Don’t trust your gut? Grab a partner. Between the two of you, I’m betting you’ll figure out what you like and don’t like.
13. Easy Bathroom Upgrade
It’s not often that you see a brick wall in a bathroom. But if you have one, try using German smear to add an effortless (and affordable) style like this example from The Frugal Homemaker.

14. Modernantique
Here’s another bedroom stunner. In this example from The Shady Gal Writes, there is a pretty heavy layer of German smear mortar that creates a modern-looking room with an antique vibe.

15. Stairway Design Possibility
Sometimes people just don’t know what to do with brick when it’s on a stairway. Well, here’s an idea! This German smear example from H2O Bungalow is executed to perfection.

16. Works with Stone and Brick
Are you wondering how this technique looks on stone? Hello Ivory Rose gives us the perfect example of how German schmear can mesh stone and brick into a cohesive design.
Watch out for the giant spiders, though!

17. Chic Coziness
This living room from @swankonline is a terrific example of how German schmear can update a brick fireplace (and wall) in a way that looks incredible but maintains that cozy home vibe.
18. Keeping it Light and Bright
If you have mostly white interior decor, a brick wall may feel like it sticks out like a sore thumb.
This example from Restore Decor and More shows how adding German schmear can turn an out-of-place brick wall into a beautiful design element.

19. Updated but Not Hidden
I adore the old-world feel that a mortar wash creates. It pays homage to the brick because it’s not completely hidden, but it creates so much more visual interest than if it were just plain brick all over this exterior facade from @elizabethannaphoto.
20. Kitchen Glam
Here’s another lovely kitchen application. And @prdcustomhomes even did it on the range hood here! I love how it pulls together the white cabinets and dark, earthy accents.
21. Laundry Room Love
Now, this is a laundry room I would want to spend time in! Love, love, love this idea from Re-Fabbed, and the wood shelf takes it to another level of awesome.

22. Gorgeous in Every Way
It’s impossible to choose favorites amongst all these beauties from @halfwaytoheavenhomestead. But if I had to, this would make the top 5 for sure.
23. Chic Home Office
Within the Grove created a space where I would love to work! The German schmear brick wall would have been lovely on its own, but that gray arch feature takes it to incredible.

24. Perfect with Wood Beams
If you have a brick fireplace in your kitchen and wonder what to do with it, @theramblingredhead offers the perfect solution! Now I want this in MY house.
Don’t forget your free copy of the printable supply list and instructions⤵️
25. Letting the Bricks Peek Through
This German schmear from @hannahkatelyn is stunning and blends rustic with modern in an ideal way.
26. Bedroom Where Dreams Come True
I love seeing a brick accent wall in a bedroom. It looks so charming here in this example from @sharon_colleen, right?
27. Updated Eye-Catcher
Oh my. If you have a colonial that needs updating, take a page out of @ned6258‘s book for the win.
28. Stone Fireplace Upgrade with German Smear
German smear can transform a stone fireplace just as radically as it can with a brick fireplace. Chris Loves Julia offers a lovely example for us in this drool-worthy bedroom.

29. Perfect with Wood
I think this technique makes wood an ideal accent element with brick. Check out this example from @graham_smith_construction.
30. Modern and Contemporary
Oulavix used German schmear to give this brick wall a modern look to fit in with the rest of the decor.

31. More Wood Love
I can’t decide what I love the most in this example from @olivewooddesigns: the wood ceiling, the heavy German smear, or the decorations. I’ll take one of each, please!
32. Meant to Be
Can you imagine this house from @houselusting WITHOUT the German smear?! I love how much it adds to this home.
33. Small but Mighty
Grace in My Space shows just how impactful this technique can be in a small area.

34. Raw Finishes are Gorgeous Too
I like this image from Irwin Construction (Photography credit: Lumen Media Group) because it shows the German smear in a different light. This technique can be done and left with a smoothish finish, OR, if more mortar is left on, a really thick, “chunkier,” heavily textured version can be achieved.
This shows a fireplace done with a really heavy coat of mortar left in place to dry.

35. Easy Stone Update
If you have a stone facade you just don’t love but can’t afford to replace, do what Up to Date Interiors did and use German smear.

36. German Smear for Deep Grout
My friend Jennifer is the blogger behind Dimples & Tangles. Her sister took on a German smear DIY with her fireplace and liked it so much they decided to do the same treatment for their parents in their home.
Both Jennifer’s sister and her parents had really deep grout lines in their fireplaces, so they share a bit about how they handled the technique in that situation. And don’t worry…it’s ANYTHING but technical.
Which, as you can probably tell by now, is a running theme with this technique on the whole!!

37. BONUS ROUND!
Of course, I couldn’t end this without a mention of likely the most famous German-smeared home of late, @thegermanschmearhouse. The Waco, TX home renovated by Chip and Joanna Gaines is now an AirBnB. YES, you can stay there!
Though the trend pre-dates Fixer Upper by hundreds of years, the technique certainly started gaining more attention once they used it on this flip. And it definitely adds a lot of class and personality to the home.
If you go there, send me some pictures! Sure looks like a lovely place to spend the night!
And that’s a wrap! 30+ gorgeous examples of the German smear technique!
I hope that this has given you a much clearer picture in your head as to whatt German smear is so that you can decide whether or not it’s the perfect brick update for your home!
Looking for more fireplace inspiration? Be sure to check these ideas out, too!
Pin this post for later:

Pssst…before you go, I sure would love to hang out with you again really soon! Sign up now and get a no-cost copy of “Builder-Grade To Beautiful: 10 Totally Transformative Home Decorating Solutions, All Under $100!” Click here to enter your email or on the image below. Your copy will be emailed right away!


Nicola says
I notice the mortar is white and not the usual grayish color. Is this readily available in the PNW?
Heather says
Can’t tell you for sure about that Nicola since I don’t live there, but when you’re searching, just be sure you look for WHITE mortar. I’d be surprised if you couldn’t find it 🙂
karen says
our home is an off-white brick. is there any type of “reverse schmear”? colored mortars we could put over the already white brick?
Shirl @swankonline says
I see a familiar space 😉 I am shirl @swankonline thanks for featuring my house! This is a great round up!
Heather says
Oh yeah! So happy to hear from you Shirl! LOVE your home!! Happy new year!