


Tired of those outdated, builder-grade flush-mount ceiling lights—aka boob lights—making your rooms feel stuck in a lighting time warp? You’re not alone! With a few simple supplies and minimal tools, you can give that dated boob light a stylish DIY makeover in about five minutes—without replacing the entire fixture. Whether you choose a sleek drum shade or a coastal-inspired capiz shell shade, you can transform a boring flush-mount ceiling light into a custom fixture that looks beautiful and completely on-trend. Let’s bust those boob lights once and for all!
What Is a Boob Light Anyway?
If you’ve ever looked up at your ceiling and thought, “Why does that light fixture remind me of something… personal?”—you’ve probably encountered a boob light.
Boob lights are the casual nickname for classic flush-mount ceiling fixtures with a rounded, dome-shaped shade—typically made of glass, plastic, or acrylic—that covers the bulb. They’ve been a staple in builder-grade homes for decades because they’re affordable, compact, and easy to install. Their rounded shape is also what makes them look, well… a little like breasts.
These fixtures have done their job in hallways, closets, kitchens, bedrooms, and other low-ceiling spaces. However, older versions can make a room feel dated and often don’t add much decorative style.
Say goodbye to boring ceiling fixtures and hello to a stylish, updated flush-mount light that makes your space shine!
Some lighting fixtures are practically begging for a makeover—and boob lights are at the top of the list. Below, you’ll find two quick and easy DIY options for updating your existing flush-mount ceiling light without replacing the entire fixture.
I’m just gonna dive right in and let you know that this titorial…whoops…TUtorial may make some of us feel a bit awkward. My apologies in advance.
But, we’re talking about boobs today.
Specifically, those often unattractive, builder-grade, usually outdated, flush-mount “boob lights”.

Today, I’m gonna give you A PAIR of knockers knockout, five-minute, zero tool methods to help you fix up the ceiling cleavage in your home, and create your own custom DIY flush mount ceiling light fixtures.

The Case for Ditching the Boob Lights
PSA before we go any further…please know that I am not anti-boob. Breasts are very useful and brilliantly designed anatomical features. I just don’t want my home to be illuminated by them.
Let’s get down to business. Apologies if this photo offends anyone but for those of you who DON’T know what a “boob light” is… get your Mardi Gras beads ready because you’re about to be flashed…

I know, I know. That’s hard to look at. Not only is this stairwell exceedingly ugly (and dirty), there is a wet t-shirt contest happening on my ceiling right now. Whoa.

Check it… not only is there another boob hanging from the ceiling, but this whole room is a TOTAL bust! (Did anyone else find that funny, because I’ve read it five times and my inner 10-year-old is still laughing).
Don’t worry, this room doesn’t look like this now! You should definitely check out its after-shot.
Oh, and before moving on, if you’re the type who loves decorating your home BIG time, but on a small-time budget? Then you’ll want to grab a free copy of “Builder-Grade To Beautiful: 10 Totally Transformative Home Decorating Solutions, All Under $100!” Click here or on the image below. Your copy will be sent right away!

Listen, I love Hooters as much as the next gal (great wings, right?) but, I don’t wanna feel like I’m dining there every night in my own home.
All this being said…
Are you ready to make your home a STREAK-FREE ZONE?
Here’s the quick and dirty video synopsis on what’s about to go down:

DIY Lighting Upgrade Video Overview
Click here to have a free copy of “10 Totally Transformational Decorating Ideas – All Under $100!” emailed to you today!
You’ll need a few simple items to get started on this simple DIY lighting project…

What You Need For “Busting” Your Boob Lights:
- Boob light fixture
- Capiz shell shade -OR- drum shade “spider”, “uno” or “chimney” fitters will work best (google these terms if I’m not speaking your language right now). **I’ve shopped a bunch of good options for you that are directly below this list)
- nylon zip (cable) ties>
- Linesman pliers OR scissors
**Here are some great options for capiz and drum shades⤵️:

Preparation: Updating Your Boob Lights
Remove the glass shade from your existing boob light fixture. Typically, this will be done by unscrewing the shade from three little screws on the side of the fixture, or, alternatively, one screw at the bottom of the shade.
If your flush mount ceiling light unscrews at the bottom, you may have to drill three little holes (use a very small bit) into the side of your fixture in order to use this technique (only if your fixture does not have these holes).

⚠️ Safety Tip: Always turn off the power at the breaker before touching any electrical fixture. If you’re unsure, call a pro!
If you LIKE the finish of your fixture, you’re ready to rock and roll. On the other hand, if you DON’T like the finish, then you’ll have to uninstall the fixture in order to spray paint it.
As you can see, our flush mount ceiling light fixture needed some help. We spray-painted ours with my favorite gold spray paint. Once you are happy with the finish/your paint has dried, reinstall the fixture.
Now, choose your own adventure…remember those books? Are you going to use a drum shade or a capiz shell shade??
Decisions, decisions. Let’s start with the drum shade option.
Hanging a Drum Shade to Update Your Flush Mount Light
*Note: The diagram below shows the fixture UNINSTALLED. The installation will work just fine whether your fixture is mounted or unmounted. For clearer pictures, I’m just showing it this way.
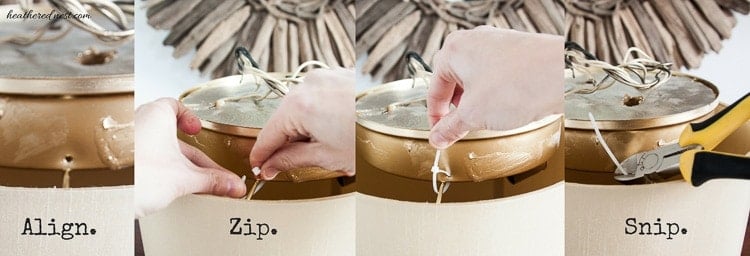
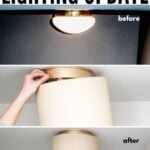
1. Align the Holes
Align (roughly) the arms of your drum shade with those holes (where you removed your glass, or where you’ve drilled) on the fixture. If it doesn’t line up exactly, no problem. You can adjust the zip ties to allow the shade to hang correctly.
2. Secure the Shade
Zip tie through a hole in the fixture, and around an arm of your shade. Secure loosely. Repeat for each hole in your fixture.
3. Level Your Shade
Once your zip ties are in place, make sure the shade hangs level. You can alter how it hangs by tightening your nylon ties.
4. Trim the Excess
With shade now hanging level, snip off the excess nylon. DONE! Below is an image of the installation of the shade while the fixture is mounted on the ceiling.

Ta-Da! No more ta-ta!

Pssst…remember! Don’t leave here empty handed! Grab a copy of “10 Totally Transformational Home Decorating Solutions – All Under $100” now. Click here or on the image below to grab yours now⤵️
Remember The Price is Right? No, not Drew Carey. I’m talking classic Bob Barker…
But Wait! There’s More!!
Using a Capiz Shade to Update Your Boob Lights
If you get bored with option #1, we’ve got another option behind Door #2! How about a beautiful capiz shade? I love the look of capiz – very chic and very coastal. The thing is, though, that they can be VERY costly! $300+ is not unusual for a capiz chandelier. Luckily, our version is MUCH more affordable!
The most inexpensive route to a capiz shade would be to MAKE one. You can find an online tutorial for making one here if you decide to go that route.
Personally, I’m exceedingly lazy, and there’s only so much time in the day. I’m thinking that you know what I mean. So I would buy one any day of the week over DIY’ing one of these suckers. 😉
However, even with that in mind, the decision for me to DIY my flush mount lighting fixture here was super easy because I had a capiz shade on-hand from an old lamp. It was bought for my first child’s nursery and had been tucked away in the garage for years.
Tip: If you don’t already have one, you can find these for a decent price – especially if you look for a “capiz windchime”, instead of a “light fixture”!
Plus, I already researched and found a bunch of great options for you…just look in the supply list up toward the top of this post! ⬆⬆⬆

Although it’s basically the same method described for the drum shade, it’s actually a bit easier with a capiz shade because of its round rim at the top— and you can fasten your cable ties pretty much wherever you need.
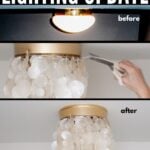
Check out this close-up of my capiz shade, and follow these simple steps:

1. Stick your zips up there through the holes in your flush mount.

2. Tighten your zips while leveling the shade.

3. Snip the excess nylon once you’re happy with how the shade hangs.

Voila! Do you like it? Honestly, I’d totally sink some cold hard cash into this if I saw it somewhere… but luckily for us DIY lovers, we don’t have to!!
You’ve done it! A GORGEOUS DIY flush mount ceiling light that ISN’T even CLOSE to a boob light!
The only problem with this project is that after you dismantle those boob lights, you have a perfectly good glass shade leftover! So, I’ve racked (get it?) my brain, and come up with two possible solutions for you.
1. Start A New Side Job?

Hmmmm….that’s a NO. Hold on, I GOT IT!
2. Fancy Trick-or-Treat Candy Bowl!

Now go knock out some knockers, friends!!
Oh, and if these boob light shades aren’t your style, guess what? We’ve done more! Here are posts about other amazing alternatives to your current flush mount light fiasco:
No More Boob Light Blunders: Boob Light Makeover FAQs
You can replace a basic boob light with a drum shade, capiz shell shade, geometric flush-mount fixture, bamboo or rattan shade, or another decorative ceiling light. If you want to change the entire fixture, choose a replacement that is compatible with your ceiling box and existing wiring. For a simpler update, you can often cover the existing fixture with a lightweight decorative shade instead.
One of the easiest ways to update a boob light is to place a lightweight drum shade or capiz shell shade over the existing fixture. Depending on the shade and fixture design, it may be possible to secure it with zip ties or another suitable mounting method. Make sure the shade is stable, does not touch the bulb or socket, and is made from materials that can safely be used near a light fixture. Turn off power at the circuit breaker before working around the fixture.
Some flush-mount shades are held in place by hidden side screws, spring clips, or a threaded finial rather than simply unscrewing. Turn off power at the circuit breaker, then inspect the fixture carefully for its attachment method. Gently wiggle the shade while loosening it, but don’t force it. If it still won’t come off—or if removing it would require drilling, disconnecting wiring, or altering the fixture—stop and contact a qualified electrician. You can also update the fixture without removing the shade by using a suitable decorative cover or painting the exterior after confirming the material can be safely painted.
Short answer: Replacing a flush-mount ceiling light with a recessed LED light usually involves removing the old fixture, cutting an opening in the ceiling, and connecting the new light to the existing wiring. Because this project involves electrical work and drywall cutting, many DIYers choose to hire an electrician for peace of mind.
Long answer: Here’s what you’re looking at for a recessed-light makeover:
Turn off power to the fixture at the circuit breaker. Verify that the power is off with a voltage tester before touching any wires.
Remove the existing boob light and inspect the electrical box, mounting hardware, and wiring. If anything looks damaged or unfamiliar, stop and contact an electrician.
Choose your recessed LED light. A canless LED wafer light may clip directly into the ceiling, while a traditional recessed fixture typically requires a separate housing.
Mark and cut the ceiling opening using the manufacturer’s template. Check for joists, ductwork, pipes, and other obstructions before cutting.
Connect the wiring exactly as directed in the installation instructions. If the electrical box or wiring needs to be modified, have a qualified electrician handle that work.
Secure the new recessed light, attach the trim, and restore power to test the fixture.
LED recessed lights can give your ceiling a sleek, modern look and may use less energy than the fixture they replace, depending on the models and bulbs being compared.
Heads up: If you’re uncomfortable with electrical work or cutting into drywall, hiring a qualified electrician is the safest option. Boob lights are one thing—but electrical shocks are definitely not part of the makeover plan!
Absolutely. A dated flush-mount ceiling light can make an otherwise updated kitchen feel unfinished, but you don’t always need to replace the entire fixture. A lightweight drum shade, capiz shell shade, woven shade, or another heat-safe decorative cover can give the light a fresh look in just a few minutes.
Before choosing a shade, check the fixture’s size, bulb type, heat clearance, and mounting method. The cover should be secure, should not touch the bulb or socket, and should be made from materials suitable for use near a light fixture. If you want a completely different look, you can also replace the flush-mount light with a modern LED fixture or another ceiling light designed for kitchen use.
Check Out These Other Flush Mount Lighting Update Ideas
1. Moroccan-Style Lantern
AKA the fun bag “full metal jacket”? I’m not even sure what that means. Whatever you want to call it, this hack using a hip geometric metal lantern is a serious upgrade from what was hanging there before.

2. DIY Bamboo Shade from placemats
AKA the “bamboo brassiere“
Fun fact: made this baby out of some bamboo placemats I found at a local thrift store.

3. Boho Look Lighting Update
Our popular boho decor boob light hack!

4. Woven/Rattan Basket Shade
A tisket, a tasket…a boob light cover from a basket!

5. Macrame Light Makeover
From mammary to macrame – watch this light fixture transform from drab to fab!
Interested in that exact shade? Here are the macrame shade deets.

I hope you have as much fun updating your boob lights as I did! What’s your favorite DIY flush mount ceiling light idea?
If you’re still on the hunt for other lighting projects and budget-friendly decorating ideas, we’ve got you covered! Check these out:
Pin these boob light solutions for later! And if you try one of these flush mount lighting updates, let others know how it went by leaving a comment on the pin! Bonus points for uploading a pic of your own project! That helps others decide if this is a lighting project they want to try, too!
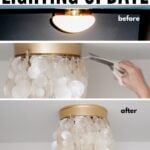
Pin it! Capiz Shade Boob Light Solution:

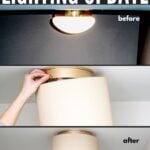
Pin it! Drum Shade Boob Light Solution

Pssst…before you go, I sure would love to hang out with you again really soon! Sign up now and get a FREE copy of “Builder-Grade To Beautiful: 10 Totally Transformative Home Decorating Solutions, All Under $100!” Click here to enter your email or on the image below. Your copy will be sent right away!



peggy says
Any ideas for something that hides the fixture AnD can be removed to change the bulbs?
These are all very creative ideas. But they dont hide the inside of the fixture or sockets from view when standing directly under the fixture – and they’re pretty ugly looking. Using zip ties means it’s never coming off, except with snips – that’s no good for anything that covers up the fixture.
Smith says
loved and saved your fix for “boob lights”. Gave me inspiration and I found the top of a two tier wire basket with hole already in center to put right back over the rod (upside down) with cap from the original light. 5 minute fix.
thanks for the inspiration
Heather Thibodeau says
Yeah! That’s awesome. You’re so welcome!
Annie get your glue gun says
best suggestions I have seen yet:) Thank you
I have 2 flush mounts AND a hanging boob light
yikes
Heather Thibodeau says
LOL! So glad! Hope you got your ceiling situation all buttoned up!!
Nora Dolan says
Great sense of fun with this post, Thanks!
MKoz says
This is genius!! So excited to try it.
Ralph Wididi says
Love how detailed you are with this DIY project 🙂
Jill K Carboni says
Your Boob Light re-do designs are AWESOME! You just saved me a ton of $$$, by not buying new light fixtures. You also saved a trip to the E.R. for some sucker family member , who didn’t get an electical shock! Yeah!!!
Heather says
LOL!! So glad to help 😉
April says
I have replaced a bathroom light with a drum, now I’m looking to replace 2 kitchen boobs w/o replacing base!
The glass that’s left over can be used as a display dish topper! Ad simple hardware knob to the hole!!
Midori says
I’m new to your site and already loving it – this was a really great idea AND provided a much-needed giggle, thank you!!!!
Tanya says
These are all so cute Heather. What an improvement without having to change the fixture completely! Love it.
Heather says
Aww, thanks Tanya!!
Jade says
Awesome idea.. will definitely do this! Makes the room look so cosy and warm.
How do u know if the cable ties nylon? Any other alternative? And any other safety precautions if I am going to use an old lamp shade?
Heather says
Hi Jade, I linked to the kind of zip ties we used. I think most of them, if not all, are made of nylon. As far as safety goes, I leave that to a homeowner to use their best judgment as all situations are different depending on the light fixture and shade they’d like to use.
Holly says
This is the best and funniest thing I’ve read in so long! My apartment has not one… it has FIVE boob lights. I figure it’s a small exchange for below-market rent in an expensive city. I’m going to try this ASAP. Thank you!
Yvonne says
sooooooooooooooooooooooo, I literally went through hundreds of pictures and videos looking for an inexpensive simple way to cover the Boob Shade, ugh! Just when I was about to give up, I landed on your site. Thank you Thank you, Thank you for this simple and inexpensive way to decorate/cover this light fixture. I will now bling out my drum lampshade in stunning chandelier fashion and hang in my master closet.
Heather says
YEAH!! So glad you found us Yvonne!!! Now go cover those darn ceiling fixtures 😉 Cheers!
Erica says
This is so awesome! I have many boobs in the house we just moved into that just won’t stop staring at me. Just wondering, how the update looks from underneath. Do you see the exposed fixture with the globes off? Would love to see a picture of that if you have one.
Heather says
I’ll try to remember to snap a picture. It’s definitely more hidden with the capiz shade than with the drum. Some people, depending on the fixture, can leave the shade on WITH the drum or capiz in place…depends on your light. I didn’t leave my glass shade on though more because it filtered too much of the light and ended up leaving the space darker than I wanted.
Nicole says
I live in military housing and cannot replace the ugly puff globe lighting in my kids bedrooms. I saw many people do projects with the boob lights, but since I had the puff ones like above, the ones I were finding wouldn’t work. I am so glad you shared this!! I cannot wait to do this project this weekend!!!
Nicole says
This is brilliant!! I’m definitely going to try this out!! Thanks for sharing!
Cricket says
Love your ideas! My parents have so many versions of boob light it’s not funny (ok yes it is) original, golden nipple, and big aeriola fan. Can’t wait to send this to my mom.
Heather says
HAHAHAHAHAHA Cricket!!! Hilarious. Yes, parents tend to be boob light offenders. Best of luck talking them out of the ceiling cleavage.
Nia Lorre says
You are TEH BEST!
The dangly hippie light shade will be perfect for my little flat.
Seriously, the cleverness of this post is off the charts.
And yes, you got my inner adolescent giggling like a dork.
Heather says
So glad we gave you a giggle Nia!!!! Happy holidays!
Suzanna says
Loved your DIY Boob job!! Thank you for the reconstruction tips!!
Heather says
You are most welcome. Glad you’re a connoisseur of home plastic surgery projects like we are 😉 Cheers!
Samantha says
Ok, so not only is this post super inspirational and helpful, but it’s freaking hilarious!!!! Bahahahaha!
Molly Campbell says
These are great ideas, thank you! We are just renting right now so I don’t want to sink a bunch of money into light fixtures, but seriously we have like 15 boob lights in the house. I just bought a cute chandelier to put in our nursery – there’s a company called Wall Pops who makes adorable chandeliers for less than $20 – I’m not sure if they’re actually capiz or not, but some of them look like it, and for $20 I would much rather buy it than spend hours making it – which is unusual for me to say! I also saw some cute chandeliers or wind chimes on Ebay that didn’t cost too much.
Heather says
Would love to see how it turns out Molly!!
Victoria @DazzleWhileFrazzled says
OMG, so funny! Never quite realize how many word plays there are on “boob”. I also never realized that’s what those lights are called. Both good alternatives, although I’m favoring #1. Visiting from DIY Like a Boss party.
Heather says
I’m all about low brow humor here, Victoria 😉 Thanks for your sweet comment…if you’ve got a ceiling cleavage issue, you should totally try one of these. They have saved my eyes here in our place 🙂
Lise says
This was great. Informative and hilarious – my inner child thanks you!
Heather says
Excellent. We have to keep those inner children happy 🙂
Judy says
I love this idea and have 2 in my hallway. I would use the capiz shells and I see a link on here too. I will shop around to see if I see any cheaper and will have to measure to see how round I need. Although I don’t have the light on for very long do you think there is an issue with the heat coming in contact with the shells?
Heather says
Some of the ideas I linked are alternatives to real capiz shells, so not sure how those would hold up with the heat. We have real capiz shells, and none are actually in contact w/ the light source (nor should any ever be, for safety) and we haven’t noticed or seen any signs of overheating, but of course, it totally depends on your shade.
Marcia Purse says
I enjoyed your post and its puns greatly. Have a question, though – how would you clean these shades, since you really can’t take them off?
The only boob light in my home is in a stairwell. It’s dangerous job to take off the glass cover and change the bulb, and making access to the bulb even more difficult with even a small lampshade would be entirely unsafe. Maybe a capiz shell shade would actually make access easier (no glass cover to remove!), but the length you show would probably hit people in the head at the top of the stairs, and I don’t think a shorter length would be attractive.
As I talk about it, I realize that actually, I think I will have to consult an electrician about this light. I’m 65 and my balance is no longer good enough to reach precariously out and up from the top step, even though I’m (barely) tall enough to reach it.
Finally, do you have any ideas for dressing up flush mounted fixtures that hold floodlights? They are SO boring! (I see a raft of toilet puns in your future…)
Charlotte @ Ciburbanity says
These days my boobs are uneven. Not sure how that relates to your post persay, but I feel this knee jerk reaction to share that little pregnancy bonus point with anyone who will listen. Happy New Year, friend! xx
Heather says
Oh my word….you are ridiculous and hilarious. And I love that you felt the need to share this….on New Years Eve…which tells me either: 1. You’ve already been drinking OR 2. You NEED to get out of the house and have a drink very badly. I am not sure which I have my money on. Happy New Years… I am happy that we found each other 😉
Fonda Rush says
You could fill that shade with concrete, let the concrete harden, break the shade (be careful) and put the resulting dome in your garden. I’ve seen it done with the round globe (icky) light shades. Enjoy!
Elly S says
I have been living with no drilling lights cuz they are “boob” lights! Now I’m so grateful to find this diy on Pinterest. Thanks for the options too.
Ree says
Thank you so much for this! Used wax paper and made a new chandelier for $2!! I’m in love.
Heather says
That’s AWESOME!! Would LOVE to see a picture!!
Maddie says
This is AWESOME, we have a few “boob” lights in our older home (built in 63 but it’s more in line with the 50’s). I love vintage but whoever thought up those lights has issues. We also have V lights (popular in the 70’s, can’t think of how to describe them), which are normally more of an outdoor thing, in our entryway and I’ve been racking my brain trying to find a way to make the entryway more classy. When we moved in it had green striped wallpaper I’m sure was installed in the 80’s, under which we found some weird sparkly wallpaper, not to mention the brick flooring.
tracie says
fantastic!!!! i’m anti boob lights too. finally got rid of the last one in our house.
the capiz is brilliant!
Claudia says
Love all the puns! I used to have mixed feelings about capiz shades, I don’t know why. I was definitely always anti-boob light!
lisette says
Love these ideas! I have those same ugly boobs and since we rent I don’t have a lot of options.
The only thing I was wondering about is if the lampshade isn’t really ugly to look into from below. If that makes sense? I’m just thinking you’ll see the remainder of the boob?
Heather says
Hi Lisette! We actually prefer the capiz shell shade, but I’ve seen people use the drum with Edison bulbs, or, you can get a piece of frosted plexiglass and put it at the base of the shade to create a cover for the base of the shade 🙂 Cheers!
Lauree says
I love that you helpe me discover another use for one of my favorite things, zip-ties! So freakin useful! I like to use them on the wire shelves in the closet to attach baskets for organizing, and anything else I can think! I’m not sure what I would do if there were no zip-ties, command strips, or velcro!
As much as I love zip-ties, I detest the boob light! I only have about 5 more to get rid of in our house, so pinning your post for when I’m ready to do that project.
Thanks for the inspiration!
Heather says
Ha! I know Lauree, I agree! Zip ties are THE BEST!!! Velcro too…I don’t use too many Command strips yet, but I think I just need to buy some more and then the inspiration will come I’m hoping!
Pili says
I love this post, not only because I love capiz windchimes but also you did it so funny to read.
Thanks for sharing it!
Heather says
Thanks so much Pili! Glad you’re here 🙂
Jami says
THANK YOU, THANK YOU, THANK YOU for posting this. I just stumbled across this. I have been at a loss for a quick fix to cover a boob light in my hallway. I had an extra lamp shade laying around and BOOM problem solved. Now I feel inspired to cover the rest of them in my house. So easy.
Heather says
Good!! I’m so glad to hear it 🙂
Shauna says
I love your wit and your creativity! A pleasure to read. Keep it up!
Donna says
This is flippin awesome! One of the best hacks yet. My hallway will be getting a makeover as soon as I get my hands on a capiz wind chime. Reading this 1st thing in the morning, thanks for the humor to start my day.
Heather says
Happy to help, Donna! Put a picture up on my Facebook page if you go for it! Would love to see how it turns out for you!!
Jessica Knott says
I just love this! And your writing style! Hilarious. Now I’m going to stalk all of your other posts! ?
Heather says
Thanks Jessica!! And please, stalk away 🙂
The DIY Homegirl says
Came to your post from a link party! You’re hilarious! Glad to see more people on the anti-boob light wagon. I have to try the capiz one soon. Thanks for sharing!
Heather says
So glad you came!! Nice to “meet” you 🙂
Megan Aubrey says
I love these two ideas Heather!! I have been disdainly staring at my apartment lights wondering what to do with them. I might have to do BOTH of these!!
The Farm-Marm says
Hahahaha! About 15 years ago my Hubby and I were at Home Depot and they had a 2pk of these lights on an end cap in the lighting dept. I told my Hubby they looked like boobs…from then on we called them boob lights =) Then I see on pinterest we aren't the only ones that call them that! I'm loving the capiz shell re-do! I can't wait to try it myself!! Thanks for the links!!
Gina Kleinworth says
LOVE it – I was just trying to explain this idea to the hubs the other day. ban them all……
Karen @ karensuponthehill says
I swear…you can really make something from nothing! love them both!
Heather says
Ha! Isn't it so rewarding? And you are a master at doing the "something" from "nothing" thing, Karen!
Cathi Taraboi says
Love it, thanks for posting! Pinned!
Samantha Smith says
Great post! Gave me a good laugh!! And got me thinking of how many boob lights I have in my home …
Maureen says
I don't have any boob lights in my house, but I kinda wish I did so I can do this to them! This was a hilarious read.
thedishbcs says
hilarious diy blog. love it. great job although my husband would be sad you got rid of boobs.
Stephanie @ thedishbcs.com
Anonymous says
Sooo love these ideas plus the commentary was hilarious! Keep up the great work! From a fellow Heather 😉
Rebecca M says
Soooo funny! Yet, very informative!
Heather says
Best compliment you could give me 🙂 Thanks so much Rebecca!!
Kristin @ My Uncommon Slice of Suburbia says
so cool, i love it!
Heather says
Thanks so much friend 🙂
Kammy Wielenga says
okay so the first time I heard the term "boob lights" was a year ago when we were redoing our house and my friend was like "SAY NO TO THE BOOB LIGHTS!!!!!!!!" When my hubby walked in carrying some from Lowes! Now all I see when I look at them is a big boob in my laundery room and mudroom!!!! Okay. So NOW, you've showed me what I can do with them! THANKS, girl!!! 🙂 Pinning
Heather says
So glad!!! Go get that ceiling cleavage and kick those scandals to the curb sister!