Easy DIY privacy film installation…
We’re going to show you how easy it is to turn a regular old pane of glass into a frosted one today, using a privacy film. In other words, we’ll teach you how to install a DIY privacy film.
We’re also gonna talk about trash. Or rather trash talk. Things like “hey, you make a better door than a window”… When you’ve got siblings, it’s kind of a given I suppose. Truth is, we do a lot of trash-talking here.

What can I say? We LIKE trash! As Oscar the Grouch said, “anything dirty or dingy or dusty” and we dig it. Sometimes literally dig it out of trash bins, dumpsters, whatever. We ain’t got no pride.
But believe it or not, that door below, wasn’t even a throw-away. I PAID for it. More on that in a sec. First, here are the supplies you’ll need to complete this DIY project:


DIY Privacy Film Supplies:
- Privacy film (we used THIS product by Gila)
- Window film application solution (They offer a whole application kit, but we didn’t purchase it…and I don’t think it’s necessary based on our experience)
- Tape measure
- Scissors
- Straight edge/utility knife
- Credit card (if you have any questions on this part, just send me the # on yours, and I’ll make sure it’s a good one)
- Paper towels or a dishrag
Back to that door. I found it on a Facebook yard sale site. If you haven’t yet gotten into using those sites….you should give them a try! You can find some AMAZING deals there…I wrote a post about how to use them, too.
Anyhow, I paid about $40 for this door. Pure vintage-trashy-loveliness. The plan was to use this in our hallway/kids bathroom.

Oh, and before moving on, if you’re the type who loves decorating your home BIG time, but on a small-time budget? Then you’ll want to grab a free copy of “Builder-Grade To Beautiful: 10 Totally Transformative Home Decorating Solutions, All Under $100!” Click here or on the image below. Your copy will be sent right away!

We removed the old standard door in that space that sat between the water closet and sinks and put in a pocket for a pocket door. And this beauty was to be our new (ok, old) pocket door.
But before we could install it, I had to make this trashy gal even trashier. I mean, I REALLY messed her up. Originally, I wanted the door to be a kind of vintage-y gas station light green (as you can see in the image above). So I sanded her, and spray painted her. OMG…WHAT A DISASTER.
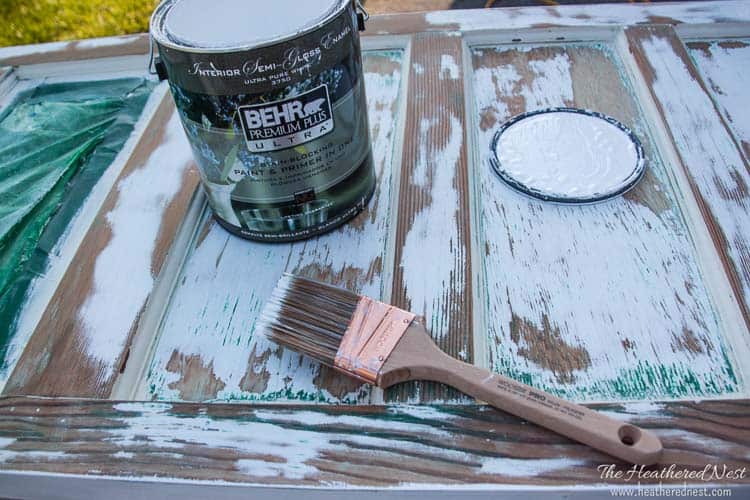
Then I paid penance by having to spend H.O.U.R.S. sanding out most of the green. I still left a smidge, because it gave it a little flair, but OY. That was a mess.
So, I decided to just paint it with Behr’s Ultra Pure White Semi-Gloss, to match the trim we were putting into the space.
To make this long story short, short as The Fresh Prince would say…at some point, I just threw my hands up and figured I was happy enough to put it in.
“BUT WAIT”, you say…”THAT DOOR HAS WINDOWS!” “ISN’T THE POINT OF HAVING A DOOR IN A BATHROOM TO GIVE YOU SOME PRIVACY??!!” Ok, I hear you. YES, privacy is…well, we’ll call it a “bonus”.

The sad reality is that in a house with three kids, there’s NO SUCH THING as privacy. But we gotta at least FAKE it, right?! The thing about this bathroom space is that there is absolutely no natural light. This was the space BEFORE.
Bummer. The last thing you want when you’re designing a space is to be working in a pitch-black cave. We thought about putting tubular skylights in the room, but those would have busted our budget.
We settled on MASSIVE amounts of lighting, AND this door…with said windows.

I have to admit, I kind of loved it without meddling with the windows…it accomplished our goal, which was to allow every single ray of sun we could grab into the space.
Like the “bath” lettering? Guess what…it’s stickers. I originally had every intention of doing some fancy, hand-stenciled gold and black antique-y style lettering on the glass. But then…I got tired and lazy. That happens to me a lot during these LONG George Lucas saga-style projects. Whatevs.
Back to the whole window/lack of privacy thing. There’s an easy fix for this, friends. I’ll show you…and it’s easy. Seriously, this is not even trash-talking…but it’s SO easy that EVEN I can do it.
How to Install Window Privacy Film:
1. Clean the glass.
Windex will do. (Side note…speaking of Windex, have you seen My Big Fat Greek Wedding? HILARIOUS. “Put some Windex on it!”) As seen above, apparently, this step must be done with laser focus and intensity (that look is either laser focus, massive irritation or a bout of constipation…your guess is as good as mine).

2. Measure and cut the privacy film.
Measure your window panes, and cut your privacy film with the scissors. I made my panels 2″ larger than the true windowpane dimension in both height and width. This will allow you some wiggle room when you’re applying the film. The excess will simply be cut off later.

3. Spray the film application solution.
Spray the application solution onto the window pane. Use a generous amount. It will be messy as the excess will be kind of slopping this way and that, so having some paper towels or a rag on hand is helpful at this point.
Peel the backing from the privacy film. This takes some doing at first. There are specific instructions on the packaging regarding this step, and the image above attempts to show the technique.

Pssst…remember! Don’t leave here empty handed! Grab a copy of “10 Totally Transformational Home Decorating Solutions – All Under $100” now. Click here or on the image below to grab yours now⤵️
4. Apply the privacy film.
Apply the film with your hands, and position as needed. Use your hands to smooth out the larger bubbles. You will have excess film on all sides. That’s ok.

5. Smooth out the privacy film.
Use your credit card to smooth out any remaining lumps, bumps and bubbles. Work from the center toward the sides.

6. Trim the excess film.
Use your utility knife to cut off the excess film. This part is a little daunting at first, but just position your razor as close to the corner of the pane as possible, and bias the angle of the knife toward the frame of the window, and not the glass.

The worst-case scenario is you mess up, and end up having to re-apply another piece of film…no big deal.

Once cut, the excess film is easily removed.

Ta-da! Privacy achieved, at least in theory. We’ll never have REAL privacy here with little ones running around, but you take the good with the bad.

And the good for this door story is so good! It brought in a fun, vintage, quirky element to this formerly blah space.

Plus, it accomplishes our goal of allowing every, single, solitary ray of sunshine we can gather into this naturally dark space. So key.

The frosted privacy film really is amazing at letting the light in, but preventing people from seeing through the window panes.

This baby had some nice windows, but in the bathroom, it definitely makes a better door than a window. I’m really glad that we can still have some of that nice filtered light in here though, thanks to this easy, inexpensive technique.
Hope everyone has a great week! Back to trash-talking here…we got a killer game of family Monopoly going. And I told our four-year-old to step off, Park Place is MINE. #HesGoinDown #DoNotPassGo #MommyDontMessAround
Pin this post for later! And if you make one, leave a comment (or better yet, a photo) on the pin! That helps others know whether they want to try this project, too!

Pssst…before you go, I sure would love to hang out with you again really soon! Sign up now and get a no-cost copy of “Builder-Grade To Beautiful: 10 Totally Transformative Home Decorating Solutions, All Under $100!” Click here to enter your email or on the image below. Your copy will be emailed right away!


Betty says
Hi. You said you didn’t apply the application spray for privacy film, so did you just put it on without anything sprayed on?
Heather says
Hi Betty! We definitely used the application spray
Jeannie says
Hello Heather,
Love the door! But would especially like to find out how you turned it into a pocket door? Expect it woukd be more than I coukd do but I have a couple of places than need a door but not enough room for one to open up. Do yiu have another page to your blog with instructions for making a pocket for a door?
Thank yiu for sharing!
Jeannie Hargis
Heather says
Hi Jeannie! We have NOT done a post on how to install a pocket door. It actually is pretty complex. You can purchase a pocket door kit online or at Home Depot, etc, but there is definitely a fair amount of skill and effort that has to be put in to make it work. It’s on our list of tutorials to write, but it’s definitely pretty difficult.
Cindy Caretto says
We had the exact same bathroom when our boys were young! I would have loved to do what you did ❤️
Heather says
Awww, thank you Cindy!! It’s a great layout. We are definitely happy w/ it. Adding the pocket door saved so much room.