Have you seen the price of outdoor curtains? Save yourself some money by making your own DIY curtains for your patio. It’s easier than you may think! [post updated 2022]
Sometimes it’s the easiest of DIY projects that make the biggest impact in our homes. And if you get very lucky, it’s the projects that are easy AND inexpensive that make the biggest difference.
In the case of our outdoor DIY curtains and DIY curtain rods, that’s definitely true. Find out how we made them (and how you can too!), their cost, and all the materials you’ll need to tackle your own set.

Oh, and before moving on, if you’re the type who loves decorating your home BIG time, but on a small-time budget? Then you’ll want to grab a free copy of “Builder-Grade To Beautiful: 10 Totally Transformative Home Decorating Solutions, All Under $100!” Click here or on the image below. Your copy will be sent right away!
The Need for Outdoor Patio Curtains
Today, I’m going to give our outdoor patio curtains some much-deserved recognition for their contribution to our outdoor space. It’s time for a curtain call for these DIY curtains.
The deck got a major DIY overhaul a few years back on a pretty tight budget. We knocked down railings, stained, and painted some outdoor rugs.

Then we built a pergola and made a DIY chandelier out of vintage cans.

It was a project that truly transformed the outdoor space. However, the pergola needed a finishing touch to make it feel complete…something to soften all the hard lines and edges. That’s how the outdoor curtains were brought into the plan.
We did the deck projects on an ultra-low budget, and one of the easiest, most inexpensive parts of the DIY deck equation was making the curtains and the wire DIY curtain rods.

How To Make DIY Outdoor Curtains
Let me show you just how simple it is to make a set of custom outdoor curtains of your own. You’ll never overpay for them again!

Supplies Needed for DIY Curtains
- red gingham polyester fabric (about $3/yard!!)
- thread/sewing machine
- you could try a no-sew option with fusion tape, but I’m not sure how well it would hold up outdoors since I haven’t tried that route
Step by Step Directions for Making the Outdoor Curtains
Yes, there’s a teeny, tiny bit of sewing involved for this DIY. You can do it, I promise!

Here’s the long and short of it, guys. I only know how to do ONE thing on my sewing machine. And that’s run a basic straight stitch.
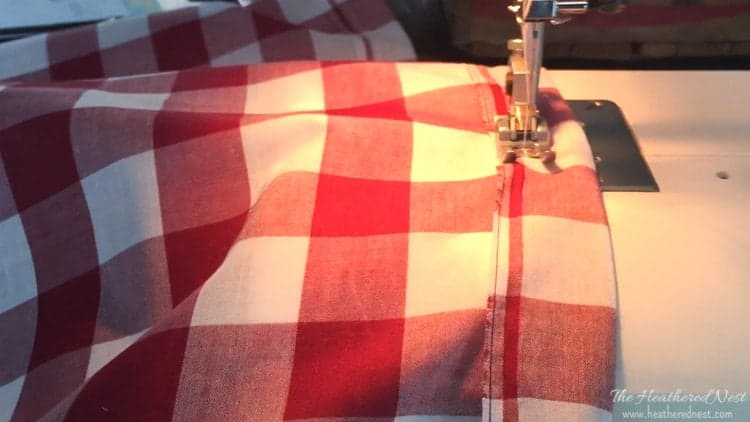
To make these DIY curtains, I simply ran a straight seam along both sides of each panel, then another straight seam along the bottom and top of each panel. Done. That’s all (I told you it was easy!).
Pssst…remember! Don’t leave here empty handed! Grab a copy of “10 Totally Transformational Home Decorating Solutions – All Under $100” now. Click here or on the image below to grab yours now⤵️
Each seam was about 1″, which was easy with this gingham fabric because the squares in this material are 1″ in size.
As I mentioned in the supply list, you could certainly try a no-sew version. I just can’t vouch for how well they’d hold up to the elements since I haven’t tried that myself. As far as difficulty goes…
The bottom line is, even as a novice seamstress, it took only about 20 minutes per panel. I made 6 panels for my pergola for a grand total of roughly 2 hours.
How To Make DIY Curtain Rods
Of course, you’ll also need a way to hang your new DIY curtains outdoors. And this solution is an easy one.

DIY Curtain Rods Supplies for Pergola
- IKEA Syrlig curtain hooks/rings (here are similar options via Amazon)
- galvanized cable
- socket set
- wire cutters
- screw hooks
- U-bolt cable clamps
- Turnbuckle (get the kind with a loop on one end and a hook on the other)
Step by Step Directions for Making Rods for Outdoor Curtains
Our DIY curtain rods are made of cable wire that we fastened to our pergola. Let’s break it down step-by-step:

1. Install Screw Hooks
You want to install screw hooks at either end of the desired length of your curtain rod. We placed the hooks about 24″ apart. That sounds really short, but these curtains are purely aesthetic since we are not going to be opening or closing them.
Pre-drill holes into the pergola posts. Screw in the screw hooks by hand, but the process is much easier if you use a pair of pliers to help you turn the hook into the post.
2. Grab a Turnbuckle
Extend it about 3/4″ of the way into its fully extended position. This will allow you some play when you install the cable.
3. Cut The Desired Length of Cable Wire
Use wire cutters and make sure to add extra length for the loops at both ends. Don’t forget to take into account the length of the turnbuckle.
4. Loop Both Ends of Cable Wire
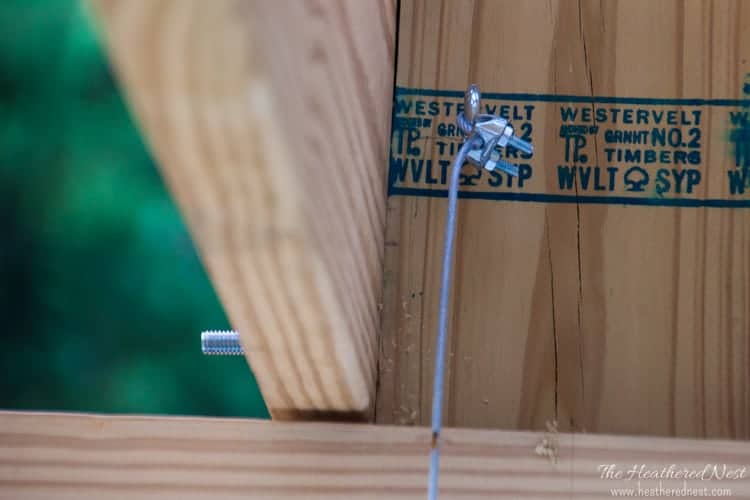
Secure each end with a U-bolt cable clamp as shown in the picture.
5. Place Loop of Cable Over the Screw Hood
As shown below in the picture – see? 😉

6. Feed the Curtain Onto the Wire
Or onto your curtain rings if you are using rings as we did. Check out the picture below.
I use these super inexpensive curtain hooks/rings from IKEA (if you don’t have an IKEA close by, here are similar options via Amazon.

7. Attach the “Hook”
Attach the “hook” portion of the turnbuckle to the other end of the cable.

8. Now Attach the “Loop”
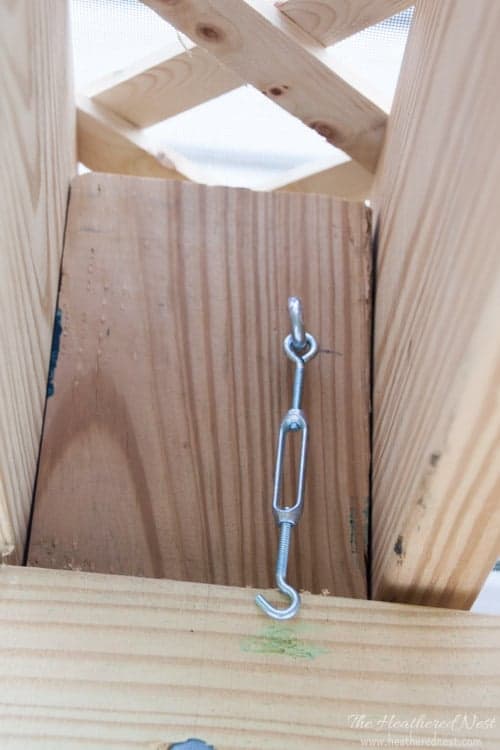
Attach the “loop” part of the turnbuckle to the screw hook. Adjust the turnbuckle so that the cable/curtain rod is tight.

That’s it! Here’s how ours looks completed (without the rings/curtain).

And I tie them back to the pergola post with a simple jute bow.

We considered buying expensive “outdoor” fabric to use to make our curtains. Buying curtains would have been easier, and that definitely appealed to my lazy gene.
However, we decided against it because where I live in Maryland stuff that’s left outdoors takes a beating. In the past, I’ve tried expensive “outdoor” rugs and fabrics. The reality is that unless you drag them indoors before every April shower, even those pricey outdoor fabrics and materials don’t last very long.
So I opted for cheap, woven polyester fabric. And you know what? It has held up really well over the years. I leave them hanging through the whole summer/fall season, during rainstorms, and every other type of weather.
The fabric has definitely faded over time, but so does more expensive fabric, if we’re being honest! It cleans really well in the washing machine, too. And frankly, I kind of love the more “vintage” vibe the fading has given the curtains as well.

With the extra fabric I had after I finished making our DIY outdoor curtains, I made a couple of easy envelope throw pillows.

They look awesome next to these home state pillows we got from Etsy.
I brought the curtains inside over the winter, washed them, and used them to decorate during the holidays!

The bolster cover? Yup, it’s one of our outdoor curtains (It’s a quick, one-minute temporary cover that you can easily try as well).
And take a looksie at that tree skirt. Yup, it’s our super inexpensive outdoor curtain again!

Outdoor DIY Curtains and DIY Curtain Rods Final Thoughts
We are definitely getting our money’s worth from this $3 fabric! As the curtain is now closing on this DIY blog post, I’ve gotta get off my duff and give this hard-working fabric a standing O. For less than $3 a yard, these outdoor curtains deserve some serious applause!
I hope this simple DIY curtain tutorial helps you easily create outdoor curtains of your own that you love for your outdoor space!
On the lookout for more affordable home decorating ideas and DIY projects? Make sure to check out these articles, too!
Pin this post for later! And if you make one, leave a comment (or better yet, a photo) on the pin! That helps others know whether they want to try this project, too!

Pssst…before you go, I sure would love to hang out with you again really soon! Sign up now and get a FREE copy of “Builder-Grade To Beautiful: 10 Totally Transformative Home Decorating Solutions, All Under $100!” Click here to enter your email or on the image below. Your copy will be sent right away!


mandy cat says
Don’t overlook shower curtains for outdoor projects. The standard size is 72″ x 72″ so for curtains you have to do something clever about adding more fabric to the bottom. But three sides are already finished and you have those nice buttonholes or grommets on the top, ready to hang. Shower curtains come in some very attractive patterns and non-plastic fabrics these days. Dealing with wet conditions is their job and they launder like champs.
Heather says
LOVE this idea, Mandy!
Larissa ~ Prodigal Pieces says
These are fantastic, Heather! Thanks for sharing.
Bethany says
I ABSOLUTLY LOVE THOSE MARYLAND PILLOWS! AND THEY GO PERFECT WITH THE CURTAINS! AWESOME JOB 🙂 AND THANKS FOR THE ETSY NAME DROP.. I WILL BE CHECKING OUT THAT SHOP ASAP!