An inexpensive DIY wood lamp tutorial…
Freeze! This is a stick-up. Go gather some twigs RIGHT NOW, and in about 10 minutes, you can make this little DIY lamp. We are going to stick some sticks UP on a lamp. A literal stick-up.
Why a DIY lamp? Two basic reasons:

- Lamps can be very expensive. And when you want a home that is decorated in a way you love, but also at a pricepoint that you can afford without breaking out the old plastic cards…then DIY options become WAY more enticing.
- Lamps that are found in the stores can be kind of boring. And I don’t know about you, but I don’t want a cookie cutter home. I want my home to be unique and a reflection of myself, my family, and the things we love. So often, a little elbow grease and DIY effort can yield really cool, and anything but run-of-the-mill results!
So let’s dive into how this rustic little DIY lamp is made, starting with a quick video tutorial!

Rustic Wood DIY Lamp Video Tutorial:
Next, here are the supplies you’ll have to gather…

Twig DIY Lamp Supplies:
- Candlestick-style table lamp (ours was purchased at Wal-Mart for under $15 but is no longer available. Here is a similar option, however)
- Twigs/Sticks cut to size (length will depend on the height of your lamp
- Twine
- Scissors
- Hot Glue/Hot Glue Gun
Rustic DIY Wood Lamp How To
1. Find an inexpensive, candlestick-style lamp.
As far as lamps go, small candlestick-style lamps are some of the most inexpensive you can typically find. I found this one at Wal-Mart for under $15.

2. Play gatherer, go get some sticks.
You can certainly buy sticks to use for this project. A popular lamp of this type is commonly done with driftwood. If you’re not a beachcomber or live in, say Iowa, your best bet may be to simply buy your sticks online.
That said, if you live anywhere with trees, as most of us likely do. Just go gather! I gathered mine from my yard. I made sure they were good and dry before using them in this project. Mine actually came from our fireplace kindling supply.

Do your best to find and use DRY wood. And insect-free wood is also a bonus.
If it’s wet, allow it to dry for as long as possible before starting to craft. You don’t want to bring mildew, mold or creepy-crawlies into the house if you can avoid it!
“Cleaning” your sticks or twigs is not a bad idea, either. I would recommend wiping them down with a damp paper towel, and shaking loose any extra bark or dirt that may be clinging to them, but the process need not be any more cumbersome than that.
3. Chop some wood.
Once you have your dry, clean, and insect-free twigs, sticks, or driftwood, you’ll want to cut it to length.

Simply determine the desired height based upon the height of your lamp. I wanted my sticks to be a bit short of the lampshade, so mine ended up being around 11″.

4. Heat your glue gun, and stick ’em up.
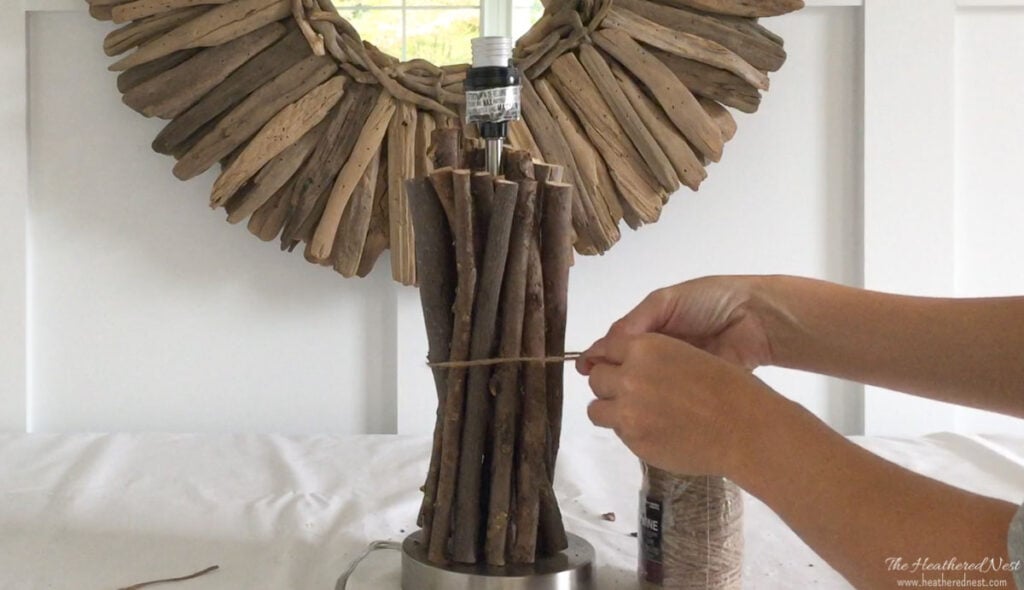
Time to glue. I recommend gluing an interior layer, or ring around the lamp, then secure it with twine.

If the twigs feel wobbly, use some of your hot glue to better secure them. Continue gluing the sticks in place.
There isn’t too much rhyme or reason to this process, just try to find sticks that will lay properly in certain positions. Since not all twigs are perfectly straight, just play with the configuration until it looks and feels most secure.

5. Once all sticks have been placed, secure with twine.
Lastly, once all your sticks have been placed in their desired locations and secured with hot glue, simply wrap twine around the mid-section of the lamp. I used a fair amount of twine because 1) I like the look and 2) it helps keep all of the twigs as secure as possible.

And that’s it…
Your Rustic DIY Wood Lamp is Done!

Super simple? Yep. That’s my favorite kind of DIY project, after all. Well, super simple, and super inexpensive. And this one fits both bills. #Winning.

Usually, this DIY wood lamp lives in our basement. I made them for this space because the room was lacking natural elements. These little stick lamps were an easy way to pull that element into the room.

On the hunt for more budget-friendly home decorating ideas or DIY lighting projects? Be sure to check these out, too!
Pssst…before you go, I sure would love to hang out with you again really soon! Sign up now and get a FREE copy of “Builder-Grade To Beautiful: 10 Totally Transformative Home Decorating Solutions, All Under $100!” Click here or on the image below. Your copy will be sent right away!


Audra @ Renewed Projects says
Fun idea! And it looks amazing.
Stephanie says
I love this project! Its so simple but looks expensive, maybe Ill have to make one for my camper!
Heather says
That would be such a fun place to use it Stephanie!
Antonella | White House Crafts says
What a beautiful idea for a lamp! I hope you’ll share this project at #thecraftycorner link party with us this week!