If you are looking to upgrade your boring light fixture in your home to something with a little “je ne sais quoi”, look no further! Installing ceiling medallions is one of the easiest DIY tutorials out there (if you do it right)…
Okay, so ceiling medallions. Well, there’s great news, good news and then…there’s bad news. I’m just going to tell you all of it at once. I’ve always been a sort of unfiltered, rip the band-aid kinda chick anyways.
Here it goes…

So the good news is that installing ceiling medallions may be the easiest DIY project ever. The great news is that it’s also inexpensive.
Oh, and before moving on, if you’re the type who loves decorating your home BIG time, but on a small-time budget? Then you’ll want to grab a free copy of “Builder-Grade To Beautiful: 10 Totally Transformative Home Decorating Solutions, All Under $100!” Click here or on the image below. Your copy will be sent right away!

OK, on to the bad news. And that is, you need to know how to install a light (i.e. play SAFELY with electricity) in order to install a ceiling medallion.
BUT…
Guess what? If that’s something you don’t know how to do (and let’s be real! If you’re not an electrician, who does?), we have a workaround for the non-electrically inclined in step 7.

…Still here? Good. You must have been around the breaker panel block once or twice. In that case, this DIY project is seriously a cinch.
What In The World Is A Ceiling Medallion?
If you are asking yourself this, I get it. It’s not something that comes up in regular conversations!
A ceiling medallion is a decorative element that has been used since the 1800s to enhance the look of a ceiling canopy A.K.A. makes it look fancy and expensive.
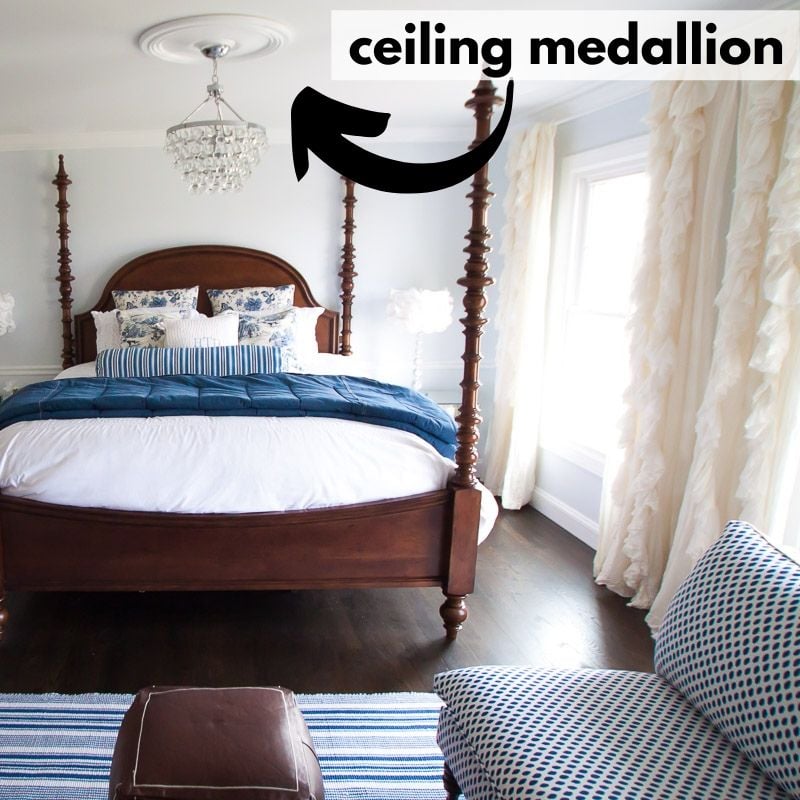
It’s also a great hack to cover up those wire and electrical boxes when setting up a chandelier and other light fixtures.

The image below shows a ceiling medallion paired with two ceiling rings. If you want to learn more about installing ceiling rings, click that link because I wrote a whole tutorial about using and installing those as well.
Spoiler alert: ceiling rings are even EASIER to install than ceiling medallions.

The image above with the tole floral chandelier and the pink ceiling feature is in my daughter’s bedroom if you want to see more of that space.

One more example of a ceiling medallion example for you. This one in our farmhouse style dining room. We added a simple white ceiling medallion to cover up those frisky light wires sticking out AND to really tie the whole look together. It was a win-win!
Here’s the cliff notes version of how to install ceiling medallions in a short and sweet one-minute video clip:

As far as supplies go, this is the shortlist of what you’re going to need to tackle a quick, easy install of ceiling medallions to make your fifth wall look majestic!

Supplies You’ll Need To Make Your Ceiling Look Fancy:
- ceiling medallion of choice
- paint (if desired)
- caulk – we recommend the kind that comes in a cartridge and uses a caulk gun (optional) rather than the flexible tubes
- construction adhesive (optional)
- light fixture of choice with canopy (canopy comes with the fixture)
**I’ve shopped some great options for ceiling medallions for you⤵️. Click on any of the medallions to get more product details:>

Oh, and before moving on, if you’re the type who loves decorating your home BIG time, but on a small-time budget? Then you’ll want to grab a free copy of “Builder-Grade To Beautiful: 10 Totally Transformative Home Decorating Solutions, All Under $100!” Click here or on the image below. Your copy will be sent right away!
How to Install Ceiling Medallions Yourself
You ready? Let’s do this!
1. Choose an appropriate medallion for your light fixture.
I’m assuming you have a light fixture picked out already. If not, go do that first 😉
Once you have your light picked out, check out some medallion options. There are tons of them, but my favorite places to look are:
There are no hard or fast rules on sizing, but in general, I personally think a medallion looks best if it’s AT LEAST the width of the light fixture, or up to 1.5x, maybe 2x LARGER.
Picking a medallion that is too small will look wonky. And yes, that’s a technical term.
It really just comes down to the size of your light fixture.
If you’re debating between two sizes, go for the larger one. By using a medallion, we’re attempting to draw the eye up and make the room look a bit grander. So bigger is probably better in this particular case.
That being said, don’t go nuts. If your fixture is only 20″ wide, a medallion that is 4x that width will look silly, you goose.
Important Sizing Note: When choosing your medallion, you need to make certain that the center hole in your chosen medallion is SMALLER than the canopy for your light fixture!! If the center hole is too big, then not only will it look silly, but the canopy won’t help to hold your medallion in place.

2. Paint the medallion if desired.
Not a requirement, but if you would like to paint the medallion to match or contrast your ceiling, it’s always easiest to do it before it’s installed on the ceiling.
Pssst…remember! Don’t leave here empty handed! Grab a copy of “10 Totally Transformational Home Decorating Solutions – All Under $100” now. Click here or on the image below to grab yours now⤵️
3. Unwire fixture if it’s already hanging. If not, move on to step 4.
You will have to unscrew the canopy and unwire your fixture before proceeding. AGAIN…DO NOT ATTEMPT THIS STEP IF YOU ARE NOT 110% competent with working with electricity!!
A medallion is not worth electrocution. There’s a happy thought.
You can hire an electrician to come to take care of this project for you. It shouldn’t take them very long to do at all, unless your fixture is going to be in a 20′ foyer, or your fixture weighs 300 lb or some very unique case.
It takes us about 30 minutes to install one of these and that accounts for uninstalling the light, mounting the medallion, then reinstalling the light.
Here’s a link to get more information about electrical services provided via Amazon.
4. Place medallion on the ceiling.
Once your fixture is down/unwired, you’ll be able to simply slide the medallion into place on the ceiling around the light housing. In the image below, the cross brace seen actually holds the medallion in place.

If you don’t have a cross brace that will help hold your medallion in place while you’re wiring your light back up, then you’ll need one of two things:
- an extra set of hands to hold the medallion up as you re-wire the light
- construction adhesive
If you decide to use some construction adhesive, simply place some on the back of the medallion, and stick onto the ceiling. You’ll have to prop a 2×4 or something up against it to hold it in place while the glue sets.
Once the adhesive is dry, continue to next step.

5. Wire light.
AGAIN, this is only for those people savvy and educated about completing electrical projects! Screwing the canopy onto the ceiling is the last step in a light fixture install. Having the canopy tightened will further assist to hold your medallion in place.
In almost every medallion we have in our home, the canopy is the ONLY thing holding the medallion to the ceiling. These ceiling medallions are typically made of styrofoam, so they are NOT heavy.
6. Caulk, if desired.
It’s not necessary, but if you look at your installed medallion, and it doesn’t look flush enough to the ceiling, then make sure the canopy is screwed in tightly enough. If it’s still not looking tight enough, you can run a bead of caulk around the medallion.
This will help to give it a very finished look.

7. If you AREN’T comfortable with wiring, and you don’t want to pay an electrician, here’s a plan B… buy SPLIT medallions!
There are a number of medallions that you can install without completely uninstalling your light/messing with electricity. “Split medallions” are segmented.
With split medallions, you can simply unscrew the canopy to your already installed light fixture, slide the sections of medallion into place, then tighten the canopy up again.
Here’s a great split medallion we found via Amazon!

You may need to use some glue (construction adhesive) on the back of the segments, but this is a great option for those who don’t trust themselves with a wiring project but still want the look of a medallion!
The other workaround is to simply ignore the medallion piece, and add alternative ceiling details, like ceiling rings!⤵️

As I mentioned earlier in the post, we did a tutorial on installing ceiling rings, and they are very easy to work with as well. Plus, the bonus for rings is that there’s absolutely no electrical know-how required, whatsoever!
Hope that these ceiling detail ideas have helped you! And if you decide to install a ceiling medallion, I’d love to see it! Tag me on social media, email me, or comment on the Pinterest pin!
Pin this post for later! And if you install your own ceiling medallion, leave a comment (or better yet, a photo) on the pin! That helps others know whether they want to try this project, too!

Pssst…before you go, I sure would love to hang out with you again really soon! Sign up now and get a no-cost copy of “Builder-Grade To Beautiful: 10 Totally Transformative Home Decorating Solutions, All Under $100!” Click here to enter your email or on the image below. Your copy will be emailed right away!


Shirley says
I’ve been wanting to do my living room ceiling in these for the longest time but could never find the rings. I didn’t realize they came in quarters and I should have. I haven’t done the ceilings yet but we are getting close so I’m really glad I came across your post as it will help tremendously!
Love the way you put yours in very much!
Heather says
Thanks Shirley! So glad it was helpful!!
Courtney @ Foxwood Forest says
I feel like ceiling medallions are making such a comeback — it’s fun to see how people are using them in various styles (traditional, MCM, rustic, etc).
Heather says
Totally agree Courtney!