Easy DIY Scrap Fabric Pumpkins for Fall…
Who knew an old sweater or a piece of scrap fabric could make such a cute pumpkin? You can make these fabric pumpkins this fall, too! All you need is a few basic items.

Sometimes I stash old stuff that I probably should just get rid of. But I always think, “what if I could do something cool with this down the road?”
So I hoard certain things. Denim being one. And old articles of clothing that have a big stain, or I’ve shrunk in the wash (“shrunk in the wash” is code for I’ve gained too much weight from excess cookie calories to squeeze into the garment at this point).

For these scrap fabric pumpkins, I used a sweater that fell into the “they shrunk” (cough, cough, wink, wink) category. Plus, some scrap cotton matelasse fabric I had leftover from another project.

Supplies for scrap fabric pumpkins:
- thrifted/old sweater(s) of choice OR scrap fabric of choice (around 12″ x 12″ or so, but more or less for larger/smaller pumpkins)
- colorful yarn
- upholstery-tufting needle
- scissors
- poly-fil
- hot glue/hot glue gun
- natural pumpkin stem(s)
- needle/thread (optional)
- (2) rubber bands per fabric pumpkin
Here is a short video tutorial for this craft:
Here is a quick video tutorial for these cute scrap fabric pumpkins!
How to make your scrap fabric pumpkins:
There are several good tutorials you can use for scrap fabric pumpkins on Pinterest. Many are similar, but some are much more time consuming than others. Some require sewing. And there were some with cool, creative twists.
Yvonne, at Stone Gable Blog, has a crafty way of creating a stem out of twine and excess fabric. So take a look at that one if you don’t like what I’ve done using real pumpkin stems.
The simplest tutorial I found for making these pumpkins to be one done by Angie at Country Chic Cottage. Check it out for all the details. Hers is based on using a sweater sleeve, but you can use any scrap of fabric, really.
The FASTEST way for you to make these scrap fabric pumpkins is to NOT make the spines (which I used the bright yarn for). Without the spines, this project will take you a whopping 3-minutes or so. WITH the spines, it’s more like 20 minutes per pumpkin.

Let’s get you started on making your scrap fabric pumpkins! The video tutorial below the supply list is really comprehensive. But if you prefer to read, here are the steps:
1. Choose fabric and cut if needed to the desired size.
You can use just about any type of fabric for this project. I chose a piece of scrap matelasse cotton I had from an upholstery project I did in our daughter’s old room. And as far as sizing goes, that’s another choose your own adventure kind of thing.
But you roughly need about a 12″ x 12″ piece of fabric. At least, try something around that size to start.

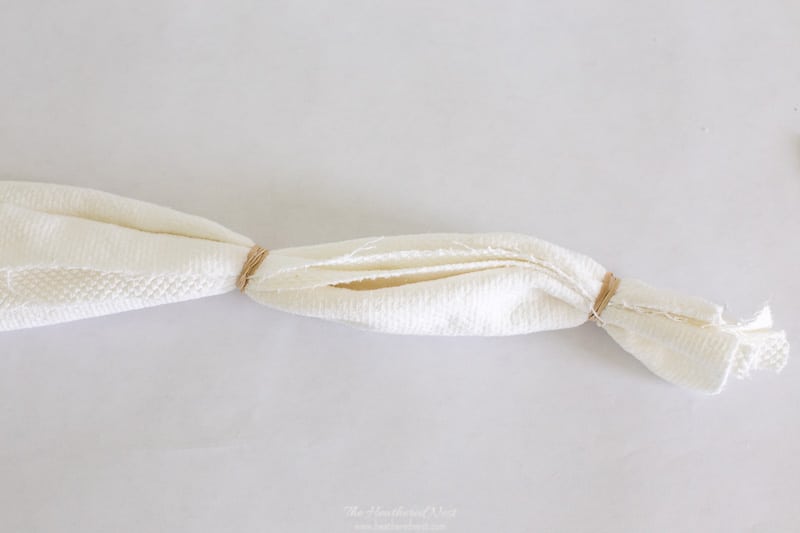
2. Make fabric tube using two rubber bands.
With the bad side of the fabric on the outside, create a tube by folding your scrap in half. Then bunch the two ends, and secure with rubber bands.
By making the rubber bands further apart, or closer together, you can make the pumpkin bigger or smaller.

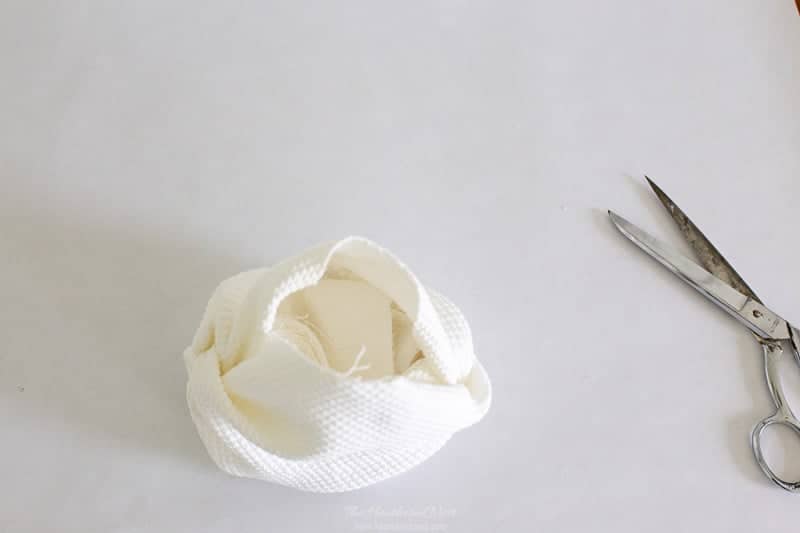
3. Flip fabric right side out.
Flip the scrap fabric right side out. The banded ends will now be inside what has become a little pouch.

4. Stuff pocket with poly-fil.
Now stuff the pouch full of poly-fil. Use more or less depending on how squishy or non-squishy you want your pumpkin to be.

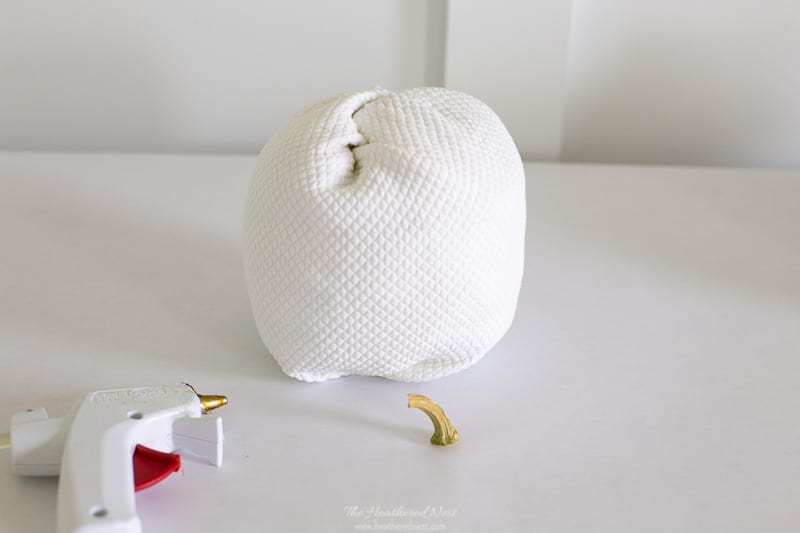
5. Hot glue seam to close pumpkin.
To make the seam a bit neater, try folding one of the ends under (toward the inside of the pumpkin), and hot glue along the opposite side of the fabric seam.
It just keeps the rough fabric ends from being exposed, which will allow fraying and won’t look as tidy.
If you’d prefer to stitch your fabric pumpkins closed with a needle and thread, that’s obviously an option as well.

6. Put on stem now, or…
You can opt to end the project here, and simply hot glue your stem into place!
Or, to get a little fancy, and spend a bit more time, I’ll show you how to add your spines using yarn.

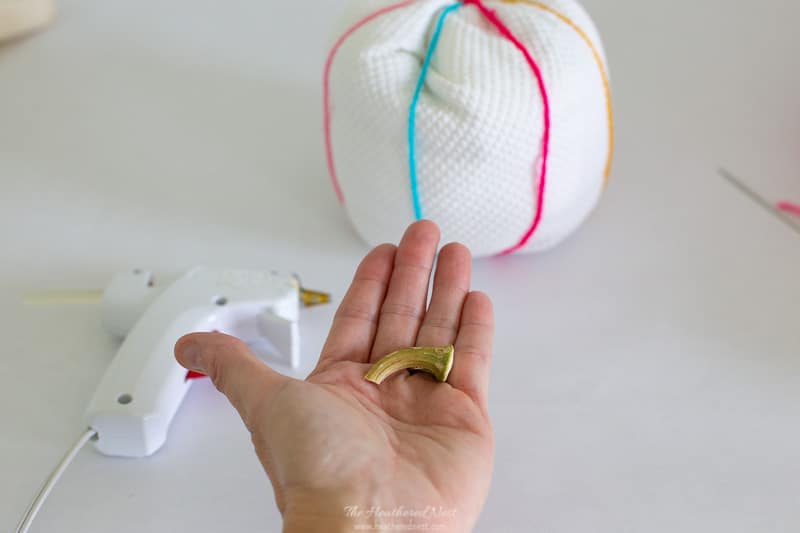
7. Create spines.
To create your pumpkin’s spines, you’ll want to have a long upholstery type/tufting needle on hand (THIS set is a good option).

Make sure your needle is a bit longer than your pumpkin to make this as easy as possible.
Thread the needle with yarn of your choice. Push needle in through one end of your pumpkin, and out the opposite end.

It can be a bit difficult to get the needle out the opposite end. Just be careful as you’re jabbing around…it’s a big needle, after all.
Once your yarn is out the other end, knot the yarn to create a spine on one side of the pumpkin as seen above. Then repeat this process to create the other half of your spine.

Cinch the yarn a bit to create the dimpling that gives your scrap fabric pumpkin the actual pumpkin look! Create as many spines as you’d like!
Once you’ve created a full spine (a piece of yarn that spans both sides of your pumpkin), simply cut the excess yarn with scissors.
Eventually, you’ll end up with an area in the center of one end of the pumpkin with small knots. You can choose to make this side the top, or the bottom. I decided based upon which way the pumpkin sat up the best.

8. Add stem.
You can use lots of different things for a stem. I personally like the look of a real pumpkin stem. I just bought some smallish pumpkins and broke the stems off.

Make sure the stems are nice and dry before gluing them onto your fabric pumpkins. Then simply hot glue into place!

And that’s it!! You’ve created adorable scrap fabric pumpkins for fall!! Hope you love them!
Pin this post for later! And if you make one, leave a comment (or better yet, a photo) on the pin! That helps others know whether they want to try this project, too!

And if you’re in the mood for some other fall, pumpkin crafts…you’re in the right place!! Check out our…
melted crayon pumpkins
chalkboard pumpkins
pom pom pumpkins
tattoo pumpkins
magazine pumpkins
map pumpkins
or bandana pumpkins!
Pssst…before you go, I sure would love to hang out with you again really soon! Sign up now and get a FREE copy of “Builder-Grade To Beautiful: 10 Totally Transformative Home Decorating Solutions, All Under $100!” Click here to enter your email or on the image below. Your copy will be sent right away!


Leave a Reply