A classic tuxedo palette for a teen bathroom update…
What happens when three teens share a bathroom? Chaos.
Chaos, and an accumulation of LOTS of self-care products. And if you happen to ask the teens what they’d like if they had a choice in how their bathroom was re-designed? Well, then you’re in for an over-abundance of opinions, and in this household, most of them won’t jive. Sigh.
Back Story of the “Before” Bathroom
In 2014, we bought a house. It sat on a lovely piece of land, was in a great school district, and had lots of…potential.
If you’re a homeowner, maybe you can relate. Perhaps you also bought a home once upon a time with “potential”. Such a positive word considering all the blood, sweat and tears that are loaded into a such a buzzword.
It’s one that realtors love, for sure. Similar to “cozy” (i.e. incredibly small), or “original” (i.e. the homeowners haven’t changed their paint, appliances, or carpet since 1962), “potential” means BUCKLE UP, BUYER. You may pay a bit less right now, but prepare yourself for decades of demolition, months of marital strife, and years of yearning that you had chosen that “move-in ready, cookie-cutter place” that felt a little boring, but sheesh…this “potential” crap is not for the faint of heart.
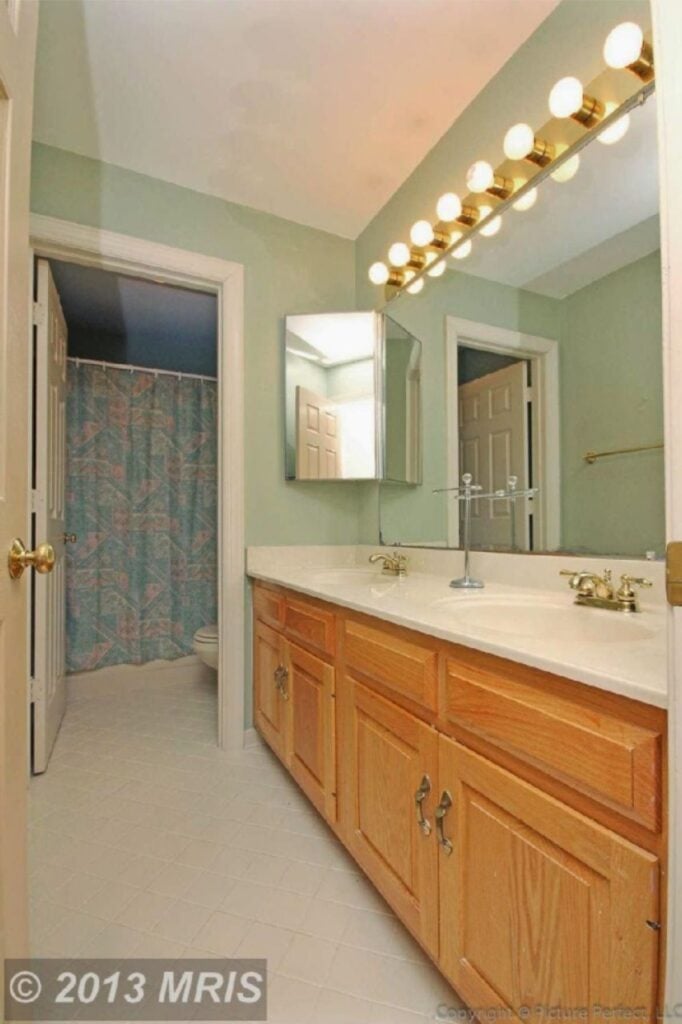
But hey, when we’re young, broke, and none-the-wiser, you feel like you’re getting a deal, right? And how hard can some painting, and ripping out walls really be? Am I right?
So we bought the house described as a “DIY’ers dream” and set to work with a big dream, and a infinitely small budget.
Kids Bathroom Budget
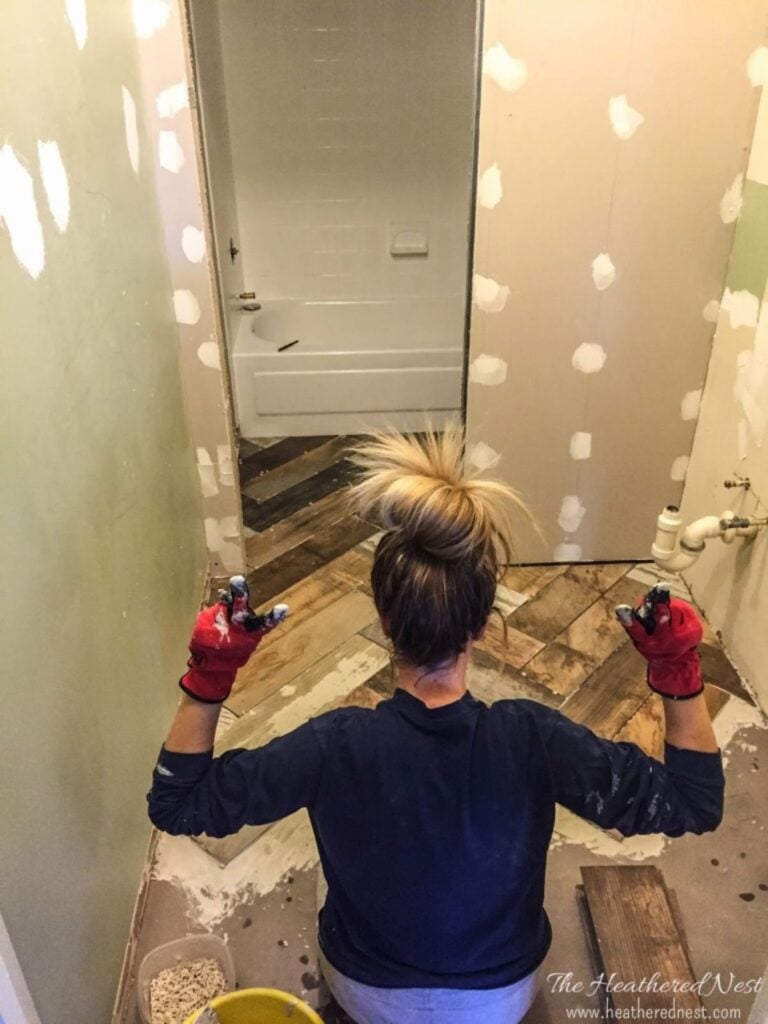
How small was the budget for the original renovation? Real small. Imagine a shoestring budget, then take a chop saw and split that shoestring straight down the middle. That was us. A microbudget. So we did what we could do.
And we completed a pretty full gut job for, drumroll 🥁…$1800!


We did a lot of things to save money. And the most savings, of course, came from not hiring anything out. Another huge saver was painting the tub and tile surround instead of replacing it. Would I recommend this to others? Heck yes. It can last a long time. I wrote an article with tips for painting your own tile, as well as one about how the painted tile actually held up/lasted. Check them out if it’s an option you’d consider.
And after many weekends of working and being covered in drywall dust, grout, paint, and caulk, we had a lovely hall bathroom for our three little ones.


And it was super functional, totally adorable, and was featured all over the internet, and in print, too…here it is in BHG magazine.
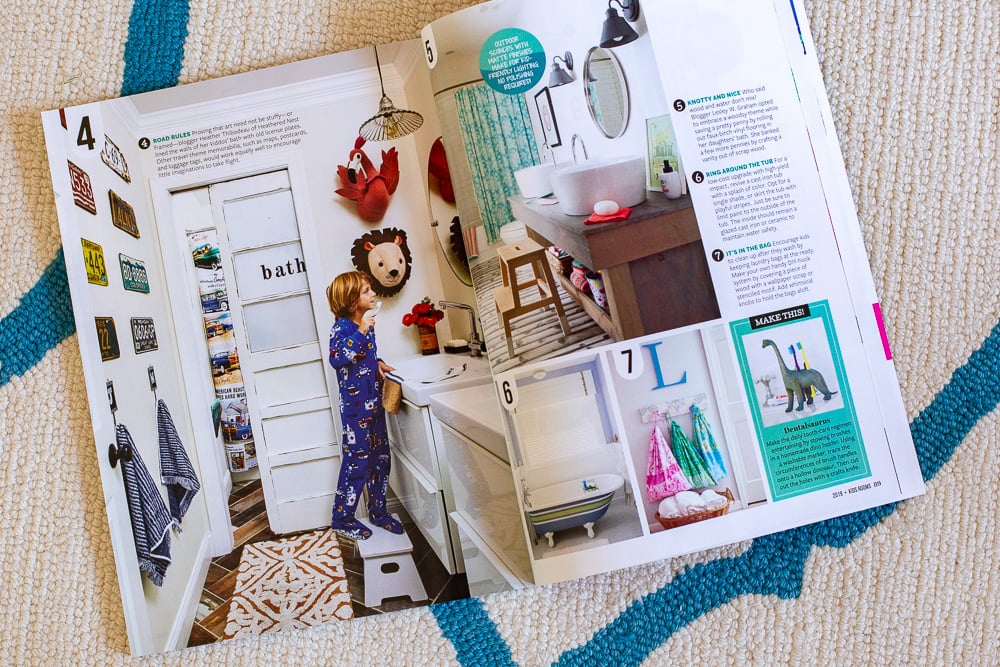
The kids loved this bathroom and it enjoyed for many years. But after a decade or three kids using one bathroom on the daily, it started looking a little shabby. And perhaps a bit “childish” was the unsolicited feedback from the offspring.
Black and White Tile Bathroom Design for Teens
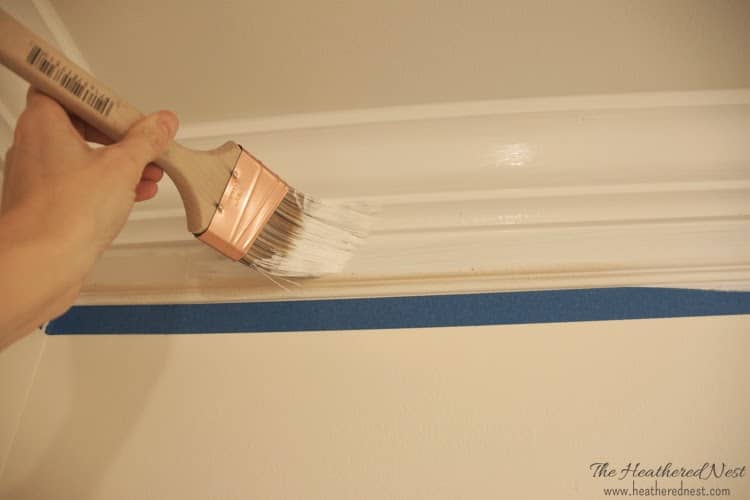
So we decided to pivot a bit. But this time, we weren’t going to DIY 100% of the renovation. Why? We’re old now. And tired. Plus, thankfully, we’re not quite as house-poor as we were when we had just moved in here.
So we paid a contractor friend for some help with demolishing the old tub/tile surround, and re-tiling that as well as the floor.
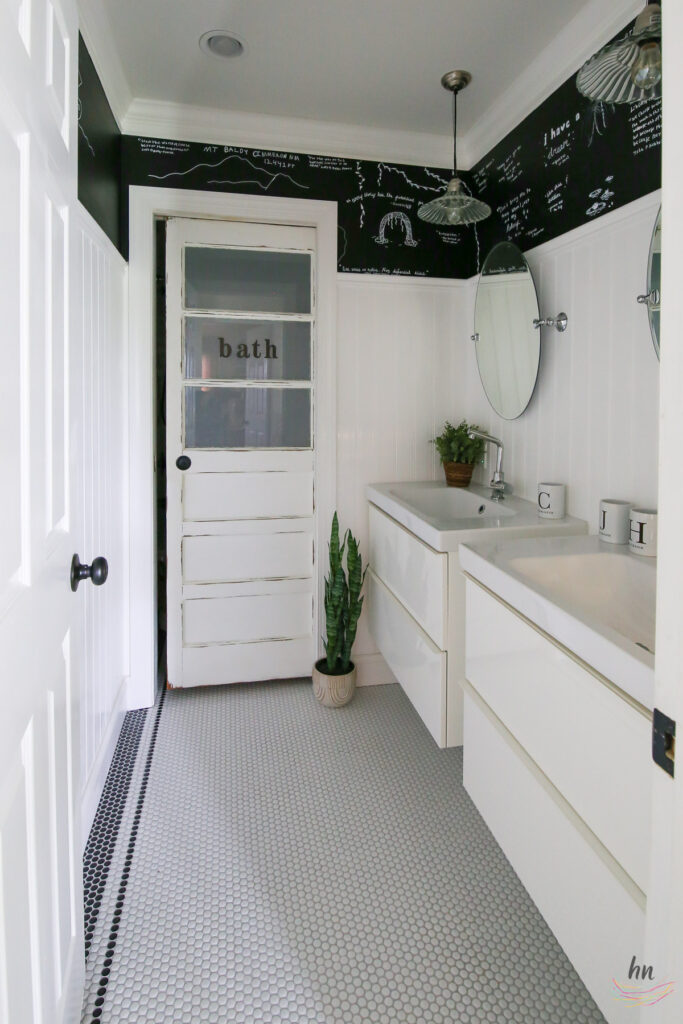
We have two boys, and one girl. All in their teens now. So we decided to go with a classic black-and-white palette that would be (hopefully) timeless and argument-proof.
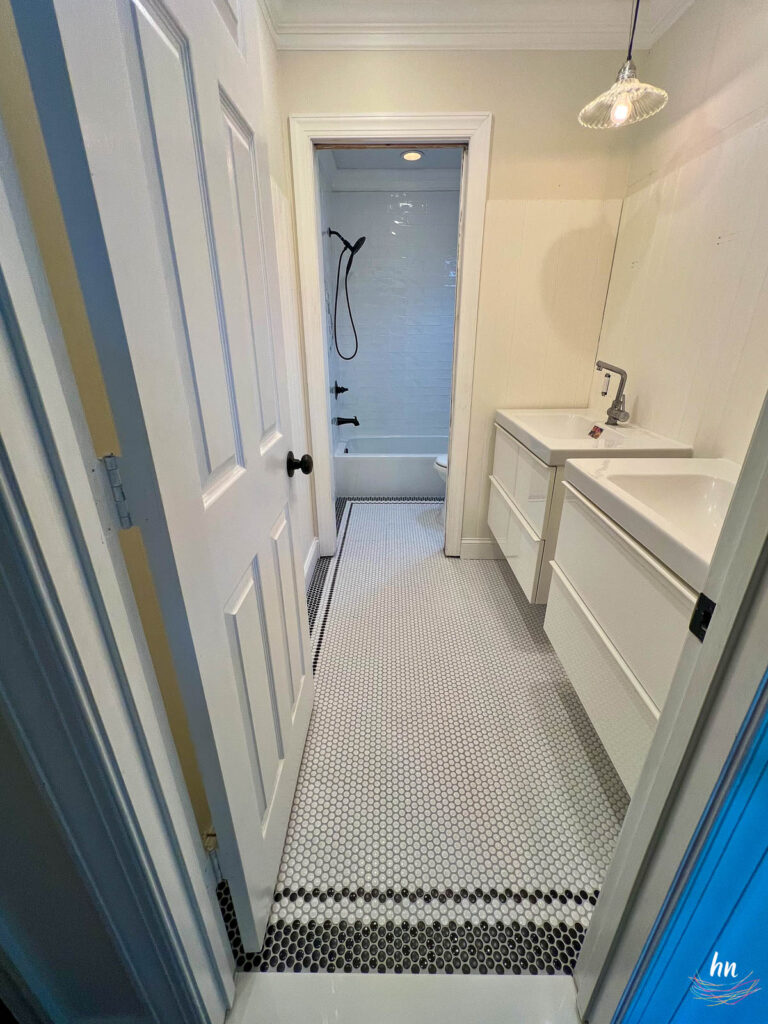
To keep costs in check, we stuck with the basic floorplan, kept the sinks, toilet, and lighting from the first renovation.
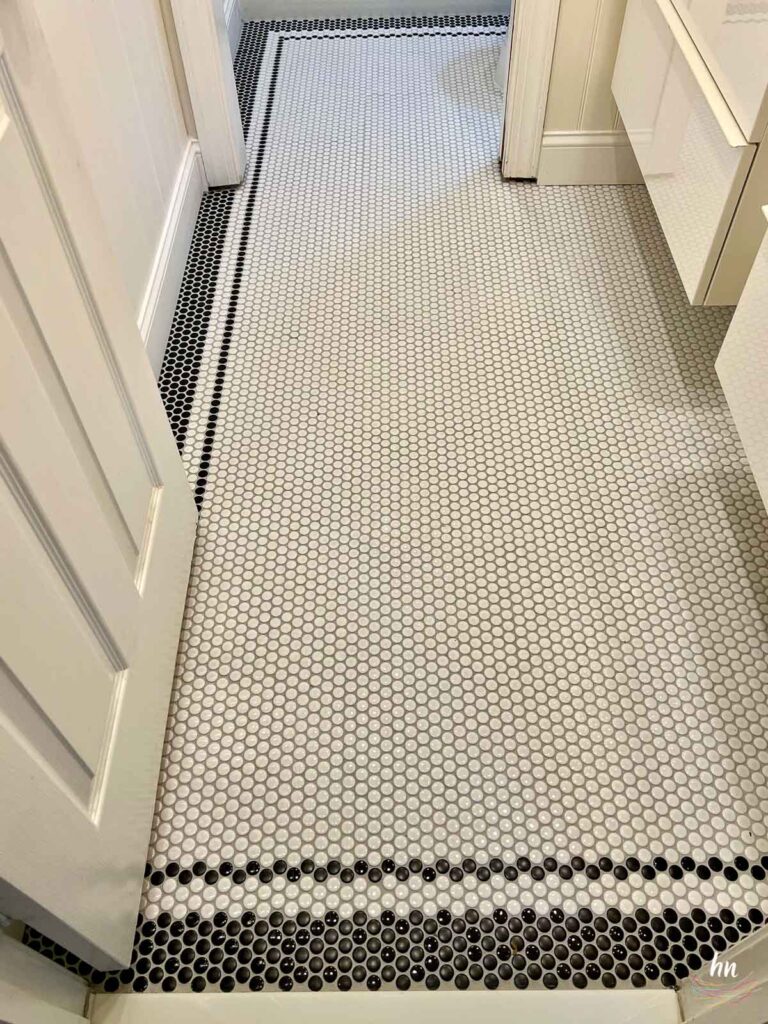
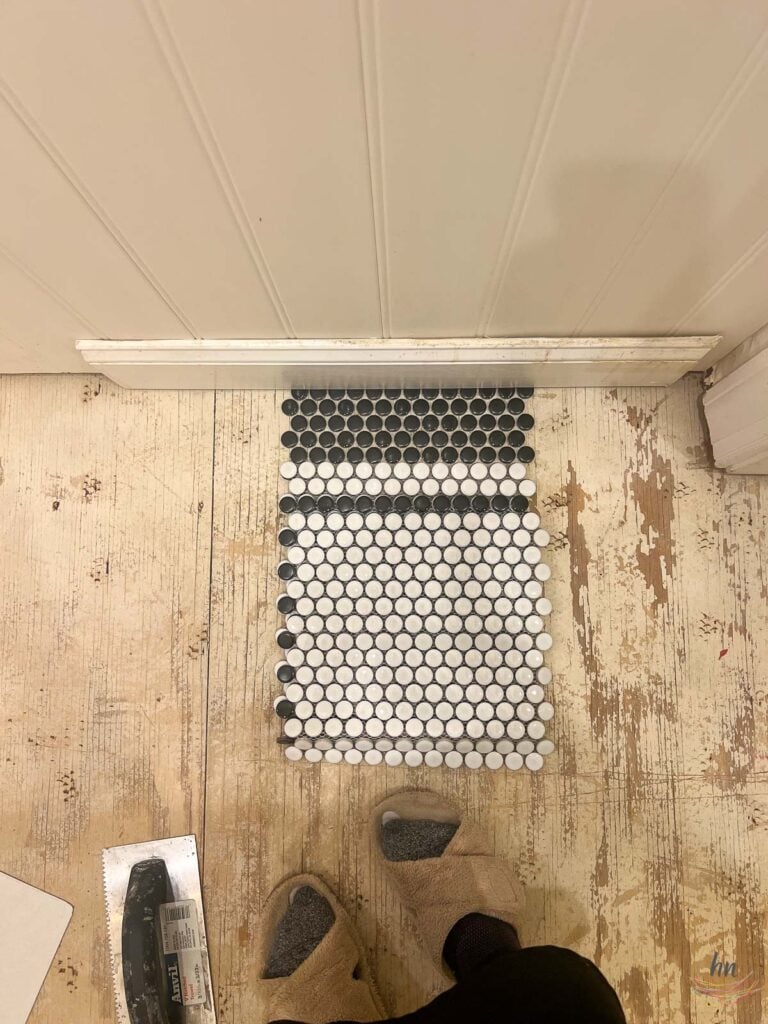
For flooring, we chose a white penny tile, and installed a black border pattern. We went with a gray grout to help the pattern stand out.
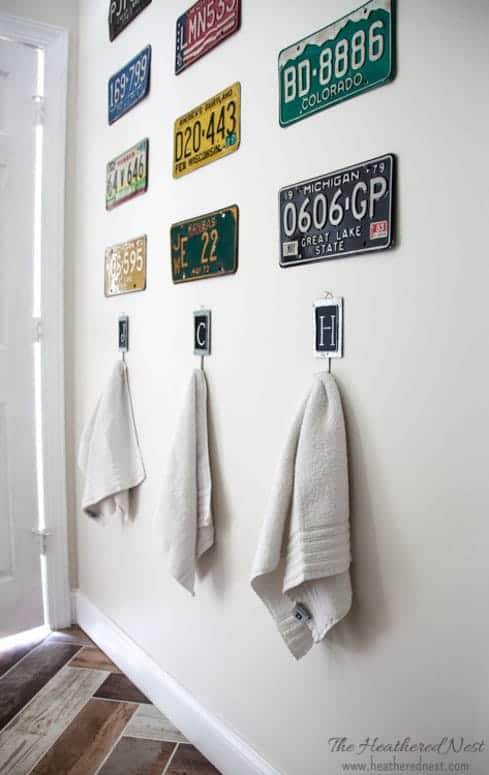
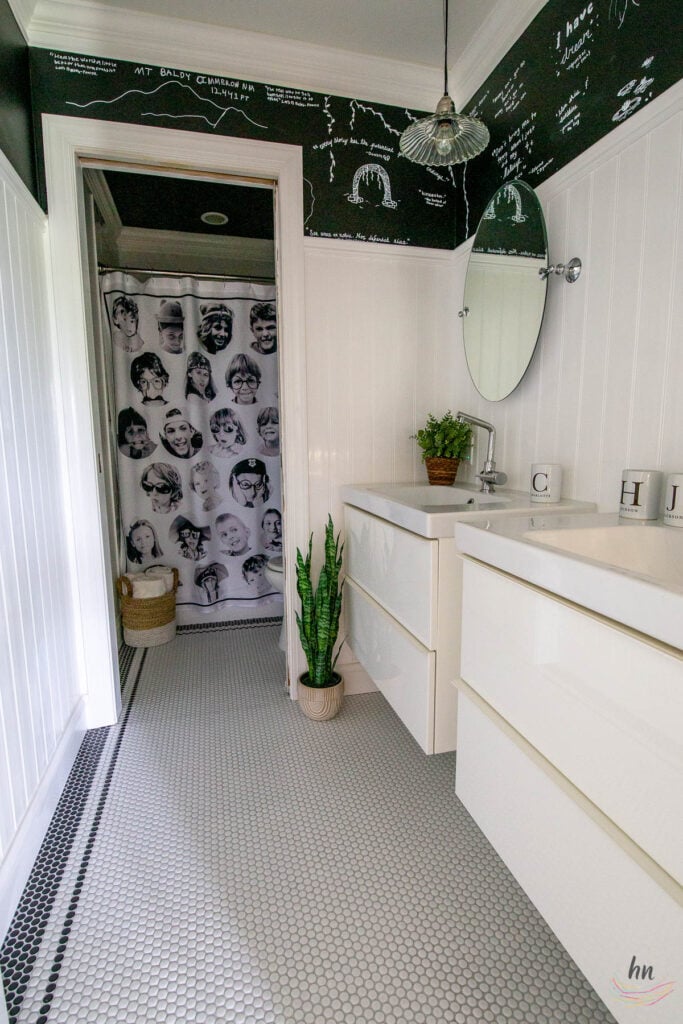
To keep the space at least a little fun and whimsical, I decided to use chalkboard paint above the board and batten. That way, the kids could infuse some of their own artwork and personality into the room, and change things when they felt compelled to do so.

Tuxedo Tile Teen Bathroom Reveal
Voila! The big kid bathroom is complete.
This room is notoriously hard to take photos of. If I was more motivated, I would have broken out all the heavy-duty camera equipment and tried for more “perfected” shots. But at this point in my life, I’m kind of in a “who-cares era” and it’s quite freeing 😂.
I’m still so glad we added the pocket door between the sinks and water closet. And we kept the vintage door that I originally thrifted and fixed up. At some point, I’d love to remove the paint, and get it back to a natural finish, but that’s a “maybe someday” thing.
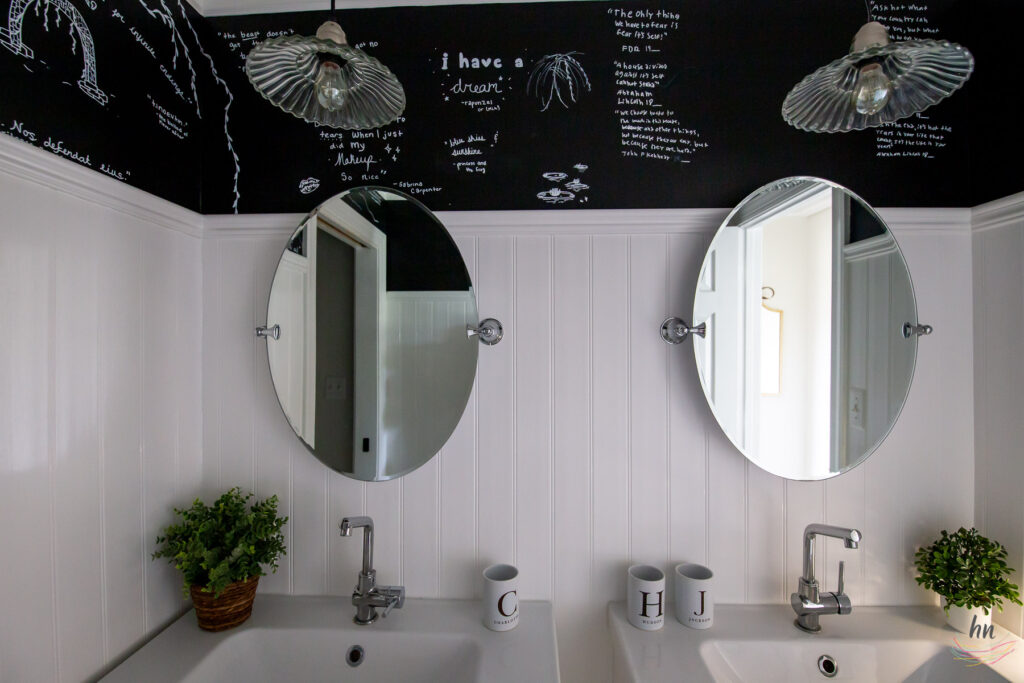
The antique pendant lights were thrifted, and I still adore them. And the mirrors were saved from the previous renovation as well. The sinks are IKEA, and have held up incredibly well despite going on 10+ years with three kids.
I painted the ceiling in the water closet SW Tricorn Black to mirror the chalkboard look in the rest of the space. And I repainted the gooseneck light fixture above the toilet from a green to black.
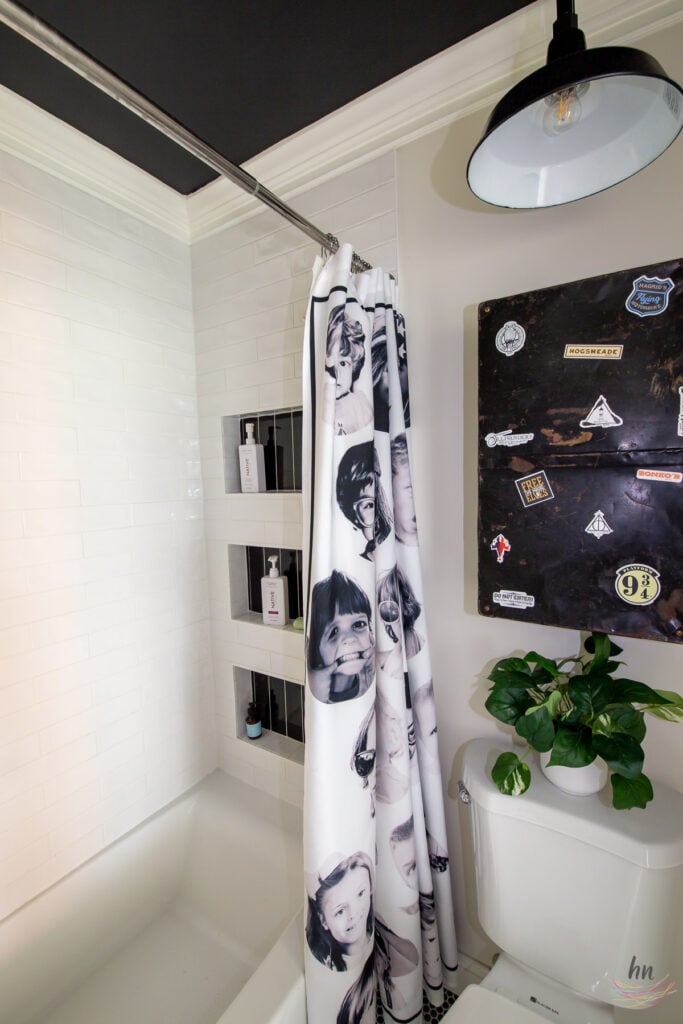
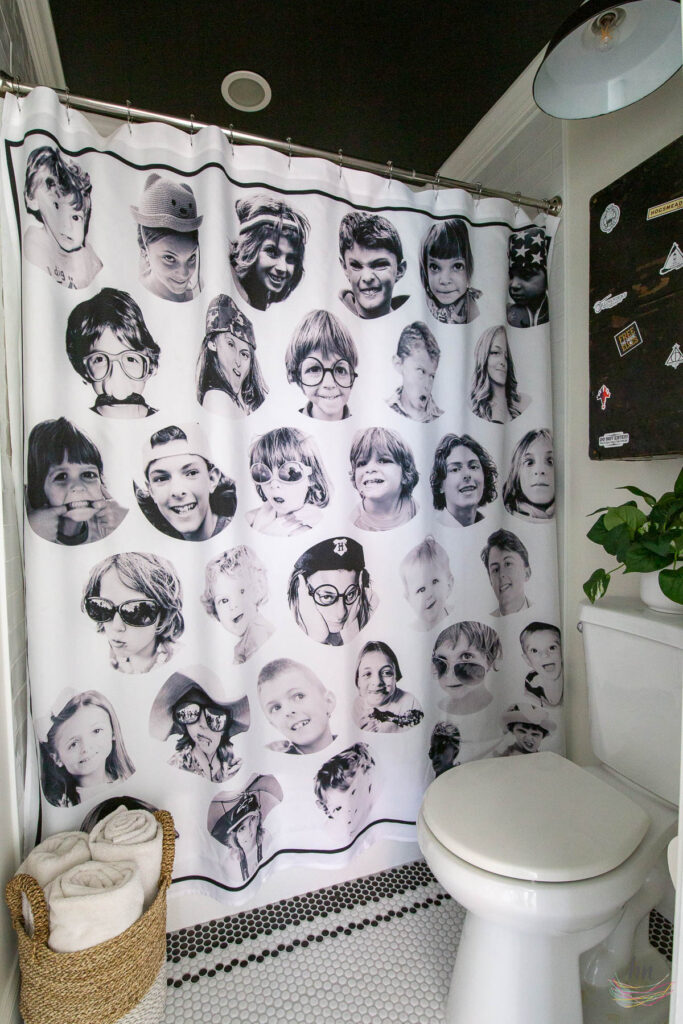
Three niches finished with vertical black subway tiles were added in the shower so that each kiddo had a bit of their own space.
Of course there was no way I was getting rid of my fun, quirky DIY medicine cabinet that I made back in the day from a vintage suitcase. I added some new Harry Potter themed vinyl stickers to it, but that’s about it.
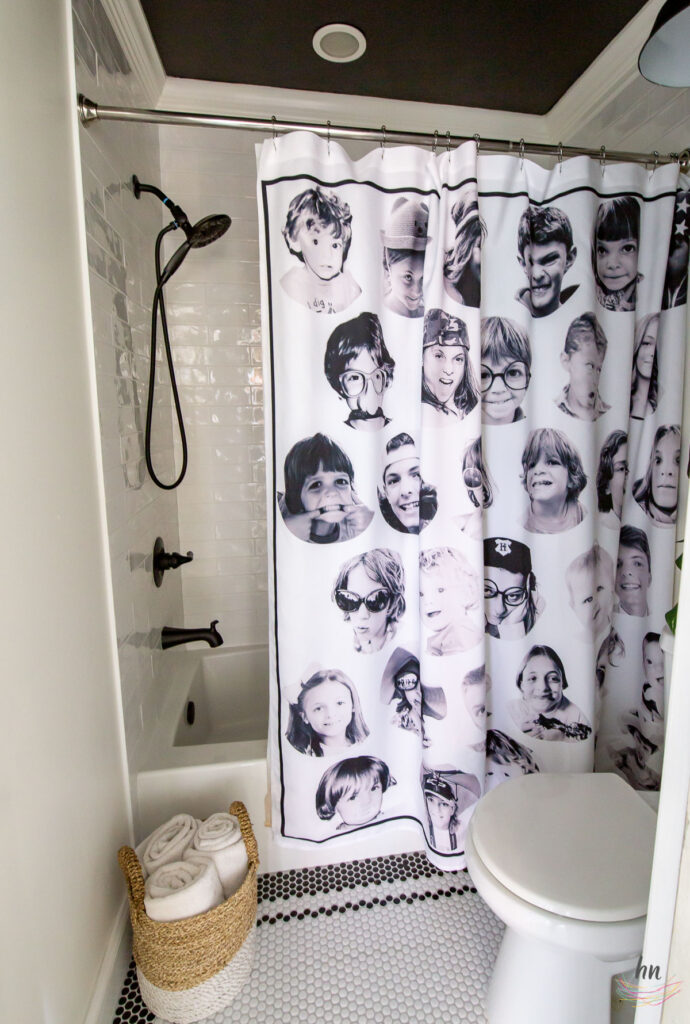
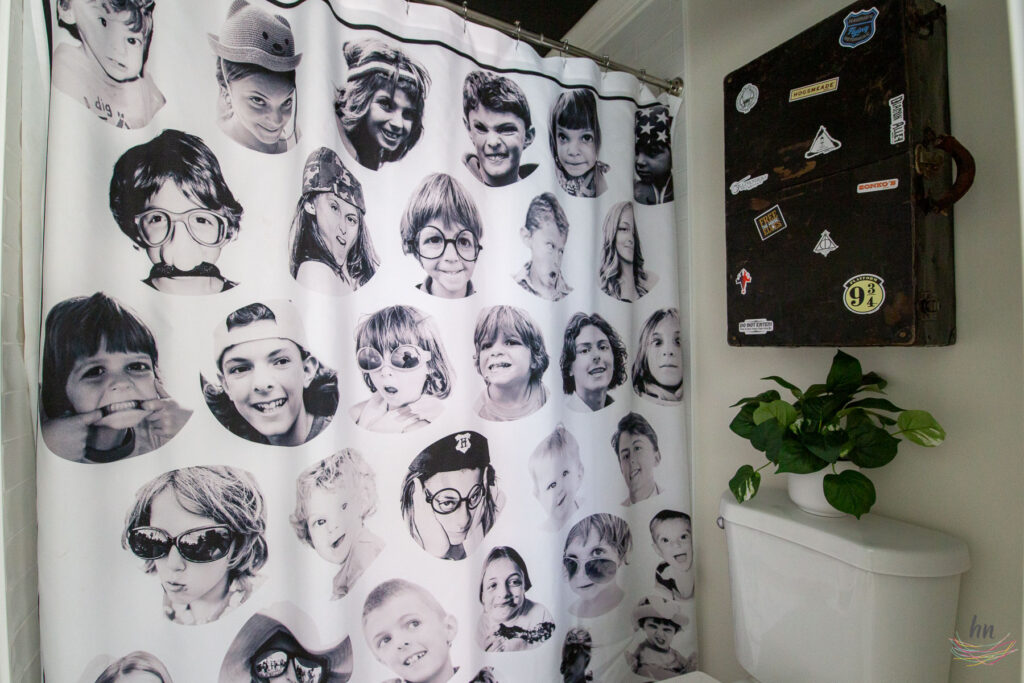
And I customized the shower curtain using favorite (and funny) family pics.
And that’s that! The kids are happy with their new, more grown-up space. I hope you like it, too.
More Bathroom Makeovers
Here are other bathroom renovations we've tackled over the years to check out...
Our DIY master bathroom reveal (AKA Mommy's Hiding Place).

Our DIY basement/guest room bathroom reveal.

The first bath we re-finished in our home, and the site of my favorite thrifted item...a unique antique pedestal sink.
The original kids' bathroom renovation project.


Leave a Reply