


How to use a pom pom maker for yarn pom poms…
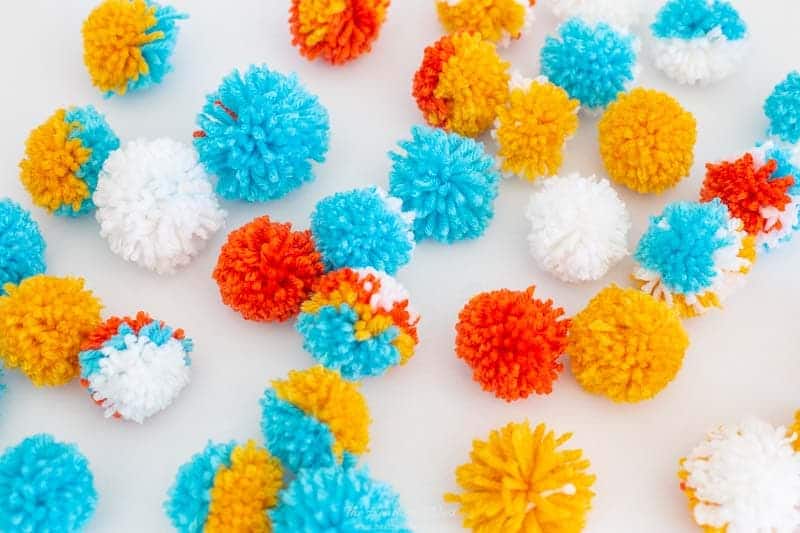
In this post, you’ll learn how to make yarn pom-poms using a store-bought pom pom maker. It’s a great little tool to have on hand if love pom pom crafts. And who doesn’t love pom pom crafts?!
But using a store-bought pom pom making tool is certainly not the only way to make pom poms!
We’ve written tutorials on several other DIY pom pom making methods, including:

Other Pom Pom Making Methods
1.) How to make pom poms with a fork (especially good for really tiny pom poms)
2.) Making pom poms with 2 toilet paper rolls (especially good for really big pom poms)
3.) How to make pom poms with cardboard (great if you haven’t decided pom pom making is something you want to buy special tools for yet)
To make pom poms with a pom pom maker, you’ll only need a couple of basic things…

Supplies Needed to Make Yarn Pom Poms
- pom pom maker (I’d recommend purchasing a package with several sizes, such as this one)
- yarn, any color(s) that makes you happy (this pack has a great color assortment for a great price)
- SHARP scissors (I love this brand*)
*my grandmother bought me my first pair of real fabric/sewing scissors. she swore by this kind, and I have as well, ever since
This 3-minute video shows the entire process for how to make yarn pom poms with a pom pom making tool.
But if you’d rather read the instructions with photos, simply scroll past the video.

Video Tutorial: How to Make Yarn Pom Poms with a Pom Pom Maker Tool
Oh, and before moving on, if you’re the type who loves decorating your home BIG time, but on a small-time budget? Then you’ll want to grab a free copy of “Builder-Grade To Beautiful: 10 Totally Transformative Home Decorating Solutions, All Under $100!” Click here or on the image below. Your copy will be sent right away!


Steps: How to Make Yarn Pom Poms with a Pom Pom Maker
The video above will show you all you need to know, but if you’d rather read we’ve got you covered.

The great thing about purchasing a package of several pom pom makers is that you’ll have flexibility to create pom poms of all different sizes. The one seen above was made with one of the smallest varieties.
1. Assemble Pom Pom Maker.
These little tools are great, but kind of flimsy (purposefully as they need to come apart during the process). So if your pom pom makers aren’t fully assembled when they arrive, don’t sweat it. They are easy to put together.

As you can see above, the larger pink pom pom maker is fully assembled. On the left, the yellow pom pom maker is unassembled.
Each pom pom maker has 6 parts. Four arms (yellow), and two center axles (white).

The (yellow) arms sit side by side, two on each side of the circular tool. They simply slide onto a little protrusion on the white axles. Once placed on the white axles, they will move up and down together.
In the shot above, the arms are open. Below, they are closed, which makes the tool form a circle.

There is a top and bottom to each tool, as well as 2 sides. The sides fit together as shown below.

2. Wrap yarn around one side of the pom pom maker.
Open one set of yellow arms. Eventually, you’ll be wrapping the yarn around each set of arms. But start with either side you’d like.

You’ll have to secure the end of the yarn initially with your fingers, but eventually, the yarn will be secured by the rest of the wrapped yarn around it.

Continue wrapping yarn around the pom pom maker arms. Avoid wrapping over the flat “feet” on the ends of the arms (kind of the bases of the rainbow, if you think of the arms as being rainbow-shaped).
That will make it difficult to close the pom pom maker, which is important for it to be able to do after this step.

You’ll want the yarn thickly layered on the pom pom maker if you want a full, fluffy pom pom.

You may have to play around with it a bit to get the right number of “wraps” down for your pom poms.

3. Snip end of yarn.
Once the yarn is thickly layered enough around the two arms, snip the end of the yarn.

4. Close arms. Open other side of pom pom maker.
With one side of your pom pom maker fully loaded with yarn and the excess yarn snipped, it’s time to close the arms.

Simply fold them back into the tool so that it again forms a circle.

Pssst…remember! Don’t leave here empty handed! Grab a copy of “10 Totally Transformational Home Decorating Solutions – All Under $100” now. Click here or on the image below to grab yours now⤵️
5. Open opposite set of pom pom maker arms and wrap.
Now it’s time to repeat this process on the other side of the pom pom maker. Holding the loaded side closed, open the empty set of arms.
Again remember to layer the yarn thickly across the full “rainbow” taking care to avoid wrapping over top of the flat “feet” area.
Once the arms are covered, cut the excess yarn and close the arms.
6. Snip loops of yarn with sharp scissors.
With both sets of arms closed, and the pom pom maker fully loaded on both sides with yarn, it’s time to snip!

Starting on one end, use your scissors to snip the yarn loops down the center of each side. The channel between the two sides of the tool will serve as a guide for cutting.

Continue from end to end, making sure each and every yarn loop has been snipped.

You’ll also want to be sure you continue to hold the arms CLOSED as you’re snipping. If you let go, one or both sides will open…and bye bye pom pom ☹️.
After snipping all the loops on one set of arms, flip the pom pom maker over, and cut all the loops on the other side of the device in the same manner.
Once all of the loops have been snipped, you’ll be able to see an open channel, dividing the tool in half.

7. Insert Yarn in Center Channel and Tie Pom Pom To Secure.
The channel between the two sides of the pom pom maker is where you will insert a fresh piece of yarn in order to secure the pom pom.

Carefully work a piece of yarn into that channel,

pulling the yarn toward the center axle of the tool. Continue holding the arms closed as you do this.

Once you feel the yarn is in the center of the tool, continue to pull the yarn out toward the opposite side.
Now it’s time to tie this yarn in order to secure the pom pom.

Carefully let go of the arms, and use both hands to tie.
Tie a knot as tightly as you can around the layers of yarn. This will cinch the middle of the wrapped yarn.
Tighter knot = more secure yarn pom pom.

8. Remove Tool.
With the pom pom now secured, you can remove the pom pom tool.

Start by opening one set of arms, and pulling them loose of the yarn.
Do the same to the other set of arms. Carefully pull them out of the pom pom. Pull the axles out (the white pieces) if they haven’t already fallen out.
You’ll end up with a shaggy-looking pom pom at first.

9. Trim to shape.
All that’s left to do is shape up your pom pom by trimming it so that the yarn is roughly the same length all around the pom.

It will take a couple passes around the pom pom to get it all trimmed up.

And that wraps it up 😂. Check out your first perfect pom pom!

You’ve now learned how to make yarn pom poms with your pom pom maker!
Interested in other fun crafting ideas? Be sure to check these articles out, too!
Pin this post for later! And if you make one, leave a comment (or better yet, a photo) on the pin! That helps others know whether they want to try this project, too!

Pssst…before you go, I sure would love to hang out with you again really soon! Sign up now and get a no-cost copy of “Builder-Grade To Beautiful: 10 Totally Transformative Home Decorating Solutions, All Under $100!” Click here to enter your email or on the image below. Your copy will be emailed right away!


Leave a Reply